Wondering why your MacBook won’t start after installing the update?
Software updates are supposed to bring fixes to existing issues on your MacBook. However, it can be annoying if the same update caused problems to your previously working computer.
If you are here, we can assume that your MacBook won’t start after installing the latest update from Apple. This should not be the case if your MacBook was working fine before installing the update.

Usually, this problem is caused by corrupted data on your MacBook. On the other hand, it can also be due to improper configurations and faulty software updates.
To help out, we’ve decided to make a guide for fixing your MacBook if it won’t start after installing an update.
Let’s begin!
1. Start In Safe Mode.
This method will work if your MacBook gets stuck on the white screen with the Apple logo upon booting up. You’ll also want to remove any peripheral devices connected to your computer before performing the steps below.
Here’s what you need to do:
- Press and hold the Power button until the ‘Loading startup options’ prompt appears.
- Now, choose a Volume.
- Press and hold the Shift key and click Continue in Safe Mode.
Your MacBook should restart automatically. When the login window appears, you should notice the ‘Safe Boot’ message in the menu bar.
Connect one of your devices back and restart your Mac. Repeat this process until your MacBook stops booting up again. When this happens, remove the previous device you’ve connected. This is what causes your MacBook to get stuck in the bootup screen.
2. Use Disk Utility.
There’s a chance that some of your resources got corrupted during the system update, causing your MacBook not to start properly. Fortunately, your Mac has a built-in software utility that checks and repairs broken system files.
Here’s how you can use Disk Utility:
- First, determine whether you are using a Mac with Apple silicon. Follow the steps below afterward:
- Apple Silicon: Turn on your Mac and hold the Power button until you see the startup options window.
- Intel Processor: Turn on your mac and press Command + R until you see the Apple logo.
- After that, select your user account, click on Next, and provide your password.
- From the Utilities window, choose Disk Utility and click Continue.
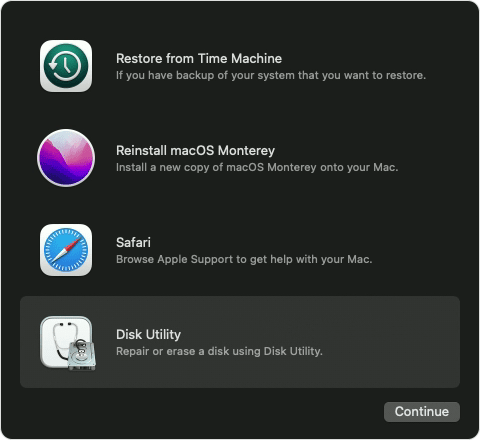
- Lastly, click on First Aid, choose Run, and follow the prompts.
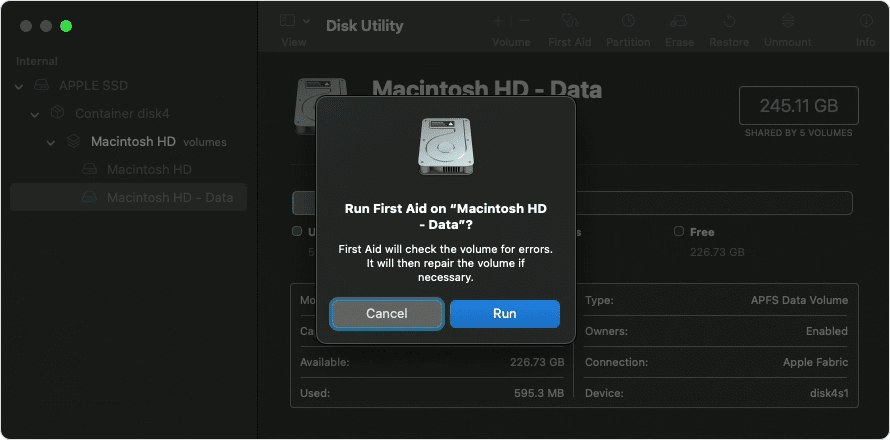
Your MacBook should automatically repair errors on your drive. Once done, reboot your system and see if your MacBook will boot normally.
3. Reset NVRAM.
If you are using a MacBook with an Intel processor, try clearing its NVRAM if it won’t boot after installing an update. NVRAM is a small amount of memory that is used by your Mac to store certain system settings.
Follow the steps below to reset your NVRAM:
- First, make sure that your MacBook is fully turned off.
- After that, turn on your Mac and immediately press and hold the Option + Command + P + R keys.
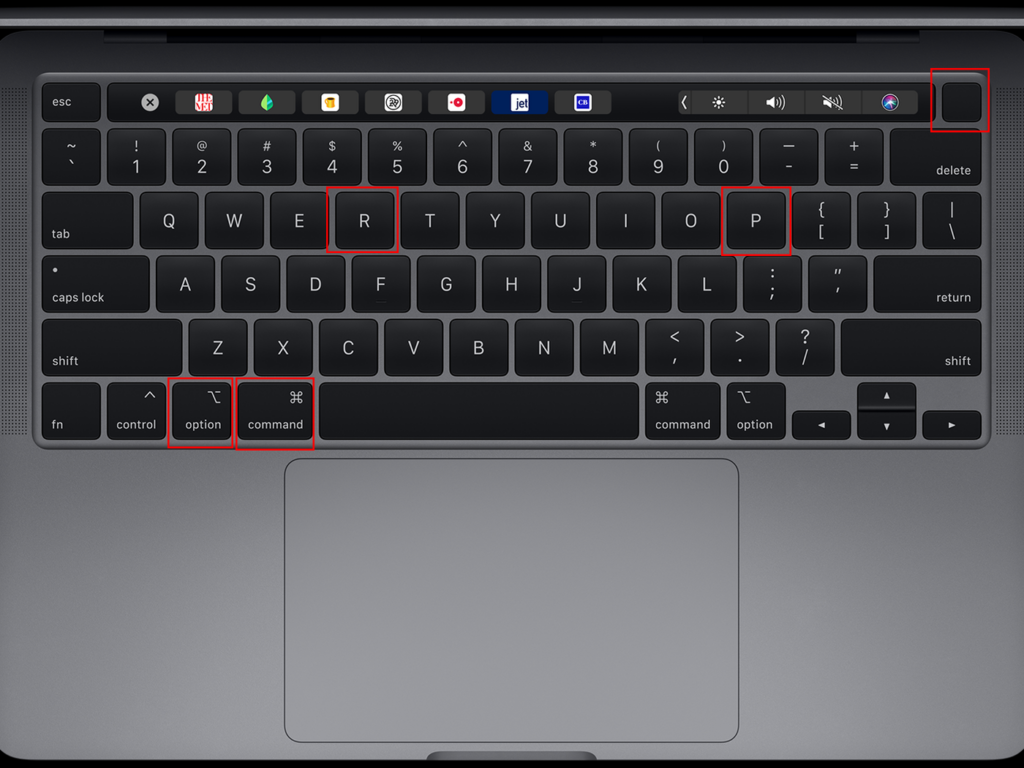
- After 20 seconds release the keys and your Mac should restart.
Use your MacBook normally and observe if you’ll still encounter issues after the update.
4. Check for Power Indication.
If your MacBook screen is not working, it may be difficult to tell if the device is turned on. However, there are several ways to check if your MacBook is powered on.
- First, check the LED indicators on your MacBook.
- You can also listen for any chimes or sounds when you turn on your MacBook. However, keep in mind that newer models from late 2016 and beyond don’t have a startup chime, except for the MacBook Air 2017.
- Check your Mac’s fans to see if they are spinning and listen for unusual noise.
- You can also press the trackpad while your MacBook is starting up. If you feel a click, your MacBook is likely turned on but the screen is not working.
If you have confirmed that your MacBook turns on but has no display, it’s best that you bring it to the nearest service center and have its display checked by a professional.
Head to the next solution if your MacBook is not powering on at all.
5. Check Power Cable and Charger.
If your MacBook suddenly won’t start after an update, there’s a chance that it just ran out of juice. Possibly, your Mac is not charging during the installation of the update and its battery charge was all used up during the process.
To confirm this, try plugging in your MacBook to the outlet and see if it will turn on.
You should also check whether the outlet is working. Try plugging in other devices to it and see if it works. On the other hand, you should also check the charging cable for damages like exposed wires and bent pins.
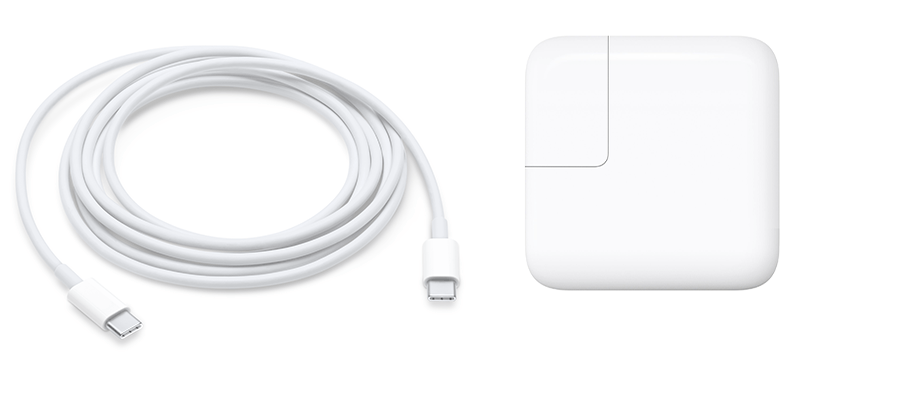
Finally, check the wall adapter and ensure that it’s still working. You can try charging your other devices using the same wall adapter and see if they will charge.
Head to the nearest Apple Store if you’ve confirmed that your charger is the problem and buy a replacement.
We strongly suggest that you purchase wall chargers directly from Apple to avoid damaging your MacBook’s battery.
Related: How to Fix MacBook Won’t Charge
6. Perform A Force Startup.
There’s a chance that your MacBook’s power button is starting to malfunction. To be sure, try pressing the power button with a bit of force and hold it down for at least 10 seconds to see if you’ll notice some reaction.
However, don’t hold the power button for too long since it might just turn on and back off again. Check the LED indicators while holding the power button to see if your computer will turn on.
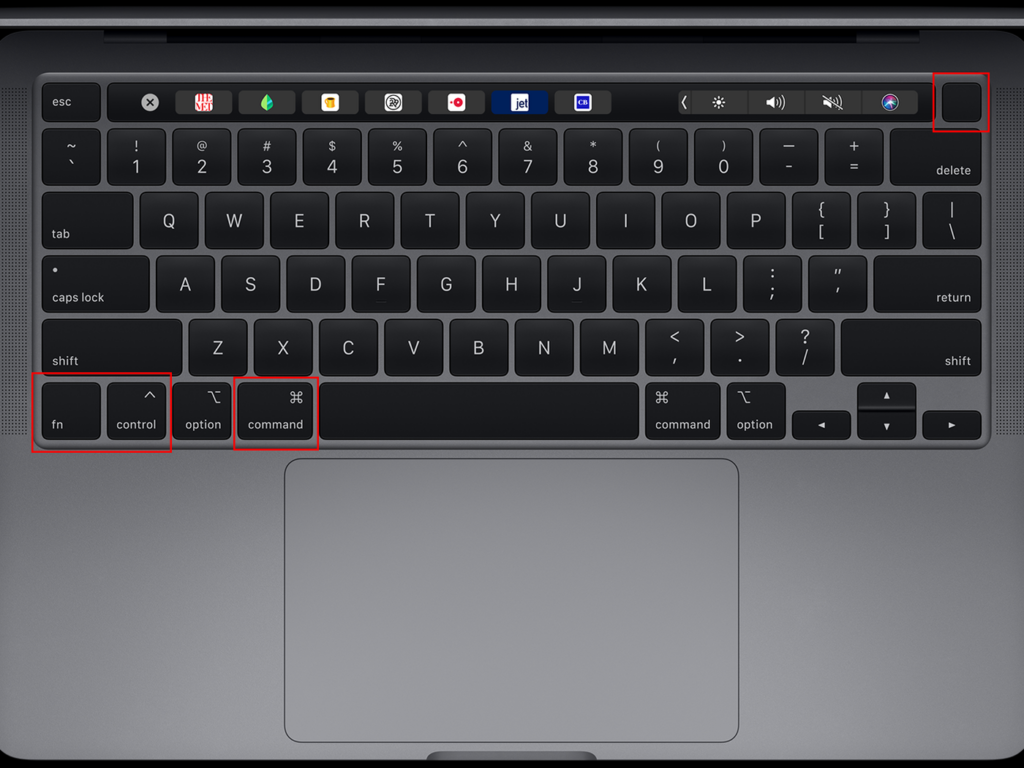
You can also perform a force startup by holding the Power + Function + Control + Command keys on your Mac. Some users reported that this keyboard shortcut solved the issue with their MacBook.
7. Reset System Management Controller.
The SMC or System Management Controller is tasked to manage the power of your Mac. Resetting the SMC can resolve problems related to power or thermal management. If your MacBook won’t start after an update, try resetting the SMC.
MacBook w/ Apple Silicon:
- Make sure that your MacBook is plugged into a charger.
- Now, shut down the device by holding the Power button for a few seconds.
- Turn on your MacBook normally.
MacBook w/ T2 Chip:
- Turn off your MacBook.
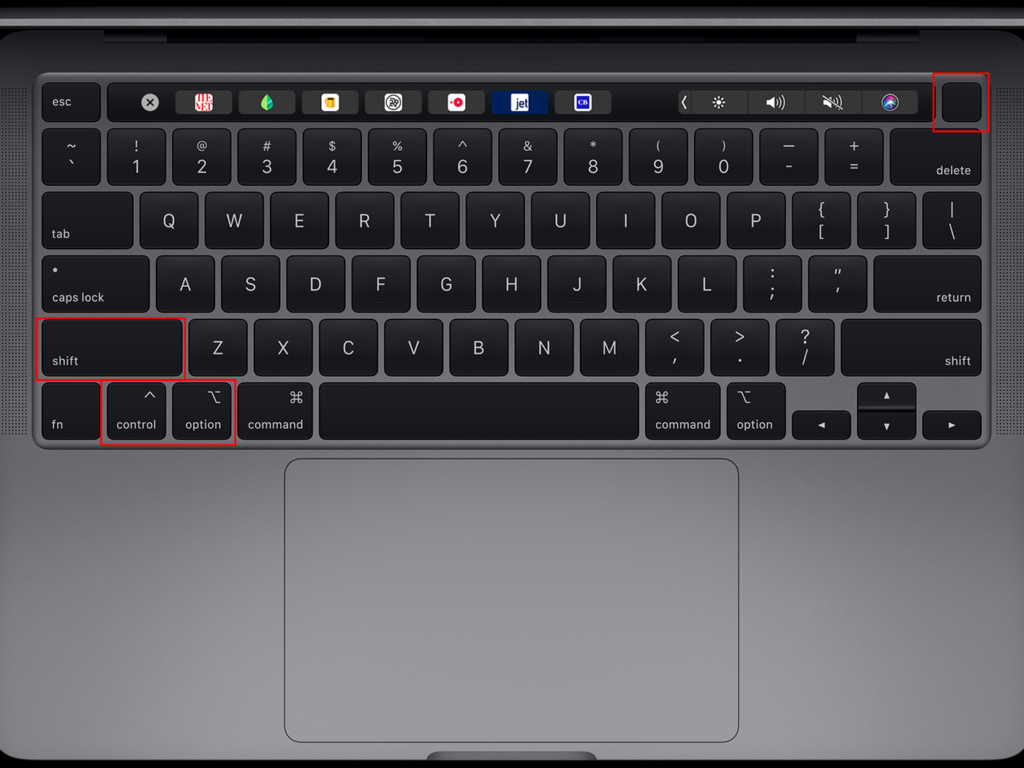
- On the keyboard, press and hold Control + Option + Shift keys together with the Power button.
- Keep holding all keys for another 7 seconds and release them. Turn on your Mac normally.
MacBook w/o T2 Chip:
- Make sure that your MacBook is turned off.
- On your keyboard, press the Shift + Control + Option keys together with the Power button.
- Continue holding all keys for 10 seconds. Release the keys afterward and turn on your Mac normally.

Once done, your MacBook should boot up and the issue should be resolved.
8. Reinstall macOS.
If your MacBook still won’t start after the update, there’s a good chance that its operating system got corrupted. In this case, the best thing to do is reinstall macOS on your computer.
Here’s what you need to do:
- First, connect your MacBook to your network using a network cable.
- Now, hold the Power button until your MacBook’s screen turns black.
- Press and hold the Command + R keys on your keyboard and turn on your Mac.
- Release the keys once the Apple logo appears.
- Lastly, select Reinstall macOS on the Utilities window and follow the prompts.
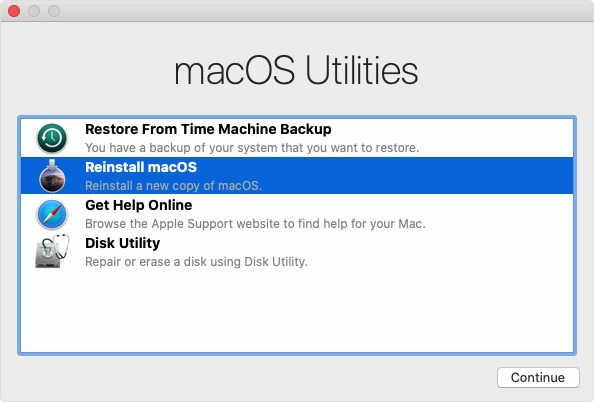
Once done, set up your MacBook and you are good to go.
Related: How to Fix MacBook Stuck in Apple Logo
9. Contact Apple.
At this point, we recommend that you let the professionals handle the situation. Visit Apple’s support page and report the issue you’re experiencing. Provide the exact model of your MacBook, the version of macOS you’ve installed, and other information that can help speed up the process.
If you want faster action, you can bring your MacBook to the nearest Apple Store and have it checked by a professional.
That brings us to the end of our guide on what to do if your MacBook won’t start after installing an update. If you have questions, please let us know in the comment section, and we’ll do our best to respond.
If this guide helped you, please share it.


