Having trouble with the Google Maps timeline not working on iPhone?
Google Maps is known to be one of the best navigation tools for your smartphones.
In addition, its countless exceptional features, such as the Google Maps timeline, makes it extremely helpful.
You can revisit any location from the past as this feature saves and tracks all the routes you’ve traveled at any specific time.
However, there are times when Google Maps timeline stops working on iPhones.
There are several reasons behind this issue, including software bugs, corrupted data, or disabled Location History.
But, with the help of the troubleshooting fixes mentioned in this guide, you can quickly overcome this problem.
So, let’s begin!
1. Restart Your Device.
The first fix in our guide is to restart your device. Temporary system bugs can cause hindrances in the proper working of Google Maps and hence fail to start the Location service. For this reason, Google Maps timeline cannot keep track of your recent visits.
By restarting your device, you can eliminate such bugs and glitches. Here’s how to do so:
- Press and hold the Power button of your iPhone till you see a power off slider on the screen.
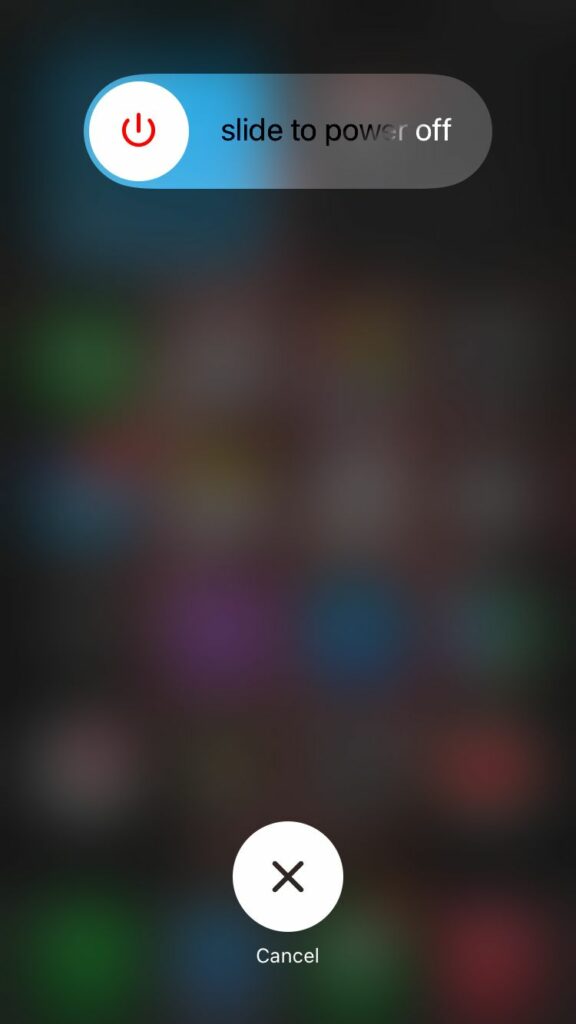
- Next, release the button and drag the slider to the right.
- Allow your device to turn off completely, then wait for a few seconds.
- Now, press and hold the Power button again to restart your device.
- You will see an Apple logo indicating that your iPhone is rebooting. Once it restarts, head over to Google Maps and see if the timeline is working or not.
2. Ensure Location History Is Enabled.
If the Location History is disabled, then Google Maps cannot record the new locations in the timeline. You need to ensure that this feature is enabled to properly track the places you visit and update them in the Google Maps timeline.
Follow the steps below to do it:
- Launch Google Maps on your iPhone.
- After that, select your profile icon from the upper-right corner.
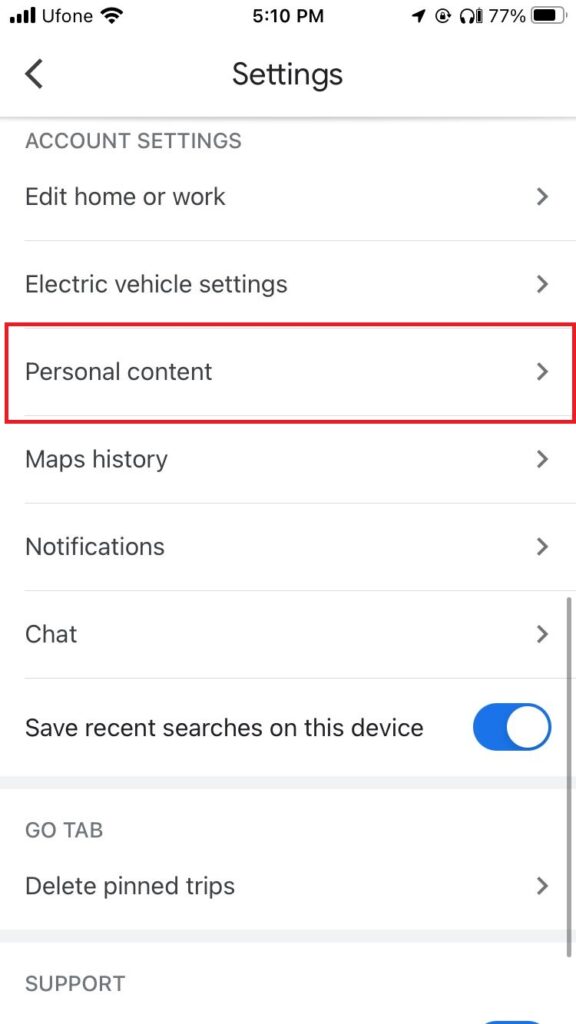
- Now, tap on Settings.
- From there, choose Personal content under the Account Setting section.
- Check if Location History is on. If it’s off, tap on it to enable it.
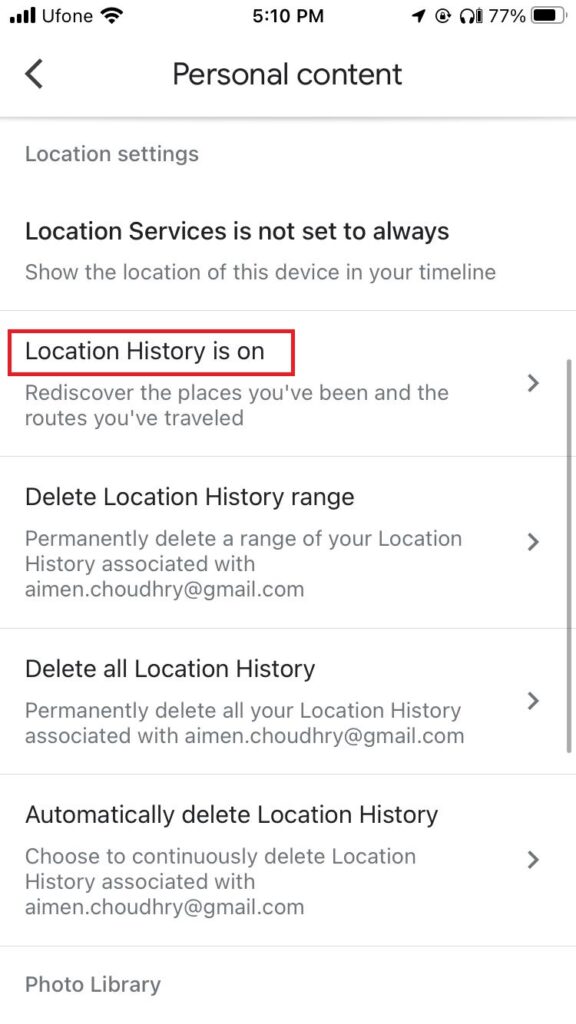
This should solve the Google Maps timeline not working on iPhone issue.
3. Enable Location Permissions for Google Maps.
For Google Maps to track and save all your recent locations and create a reliable timeline, it needs access to the Location service. If this service is disabled, the Google Maps timeline will not work efficiently.
Here’s what you must do:
- Go to Settings from your device.
- Next, scroll down and select Google Maps.
- Select Location and tap on Always from the next screen.
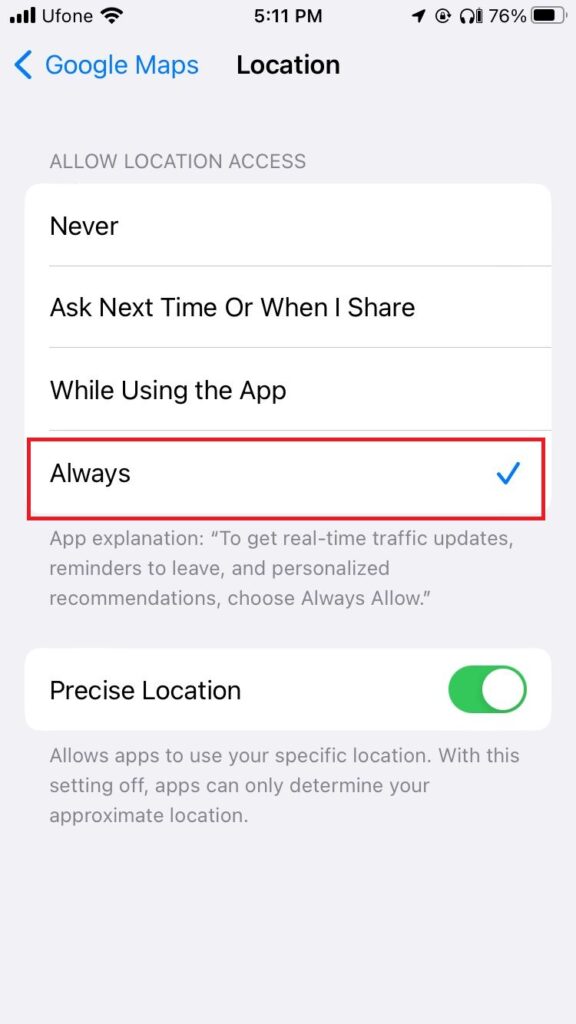
Now, head back to Google Maps, and the timeline should be working fine now. Otherwise, move to the next method from this guide to solve your problem.
4. Re-Sign Into Your Google Maps.
If the Google Maps timeline feature is still not working on your iPhone, then the next fix is to sign out of your Google account and re-sign in. This may prove to be effective if any authentication issue with your Google account is the reason behind Google Maps’ inability to save your timeline.
Below are the steps you must follow:
- Go to the Google Maps account and tap on your profile icon from the screen’s top-right corner.
- Select the down arrow adjacent to your account and tap on Use Maps without an account.
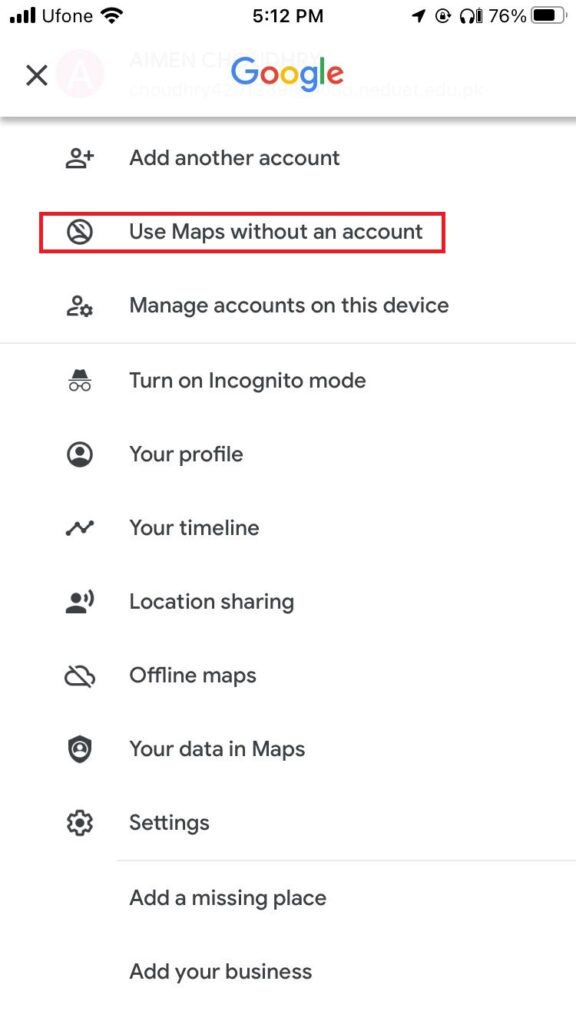
- Now, select the profile icon again and tap on Choose an Account.
- Finally, tap on your account name and enter your credentials to log back into your Google account.
Once you’re signed in, go back and check your Google Maps timeline, it should be working.
5. Enable Web & App Activity Tracking.
Google Maps also relies on your actions within other Google apps to produce a complete timeline. If you have disabled Web & App Activity tracking for this particular app, it will likely influence the working of the Google Maps timeline feature.
To turn on Web & App Activity tracking for your Google account, follow the steps below:
- Open the Google Maps app from your iPhone.
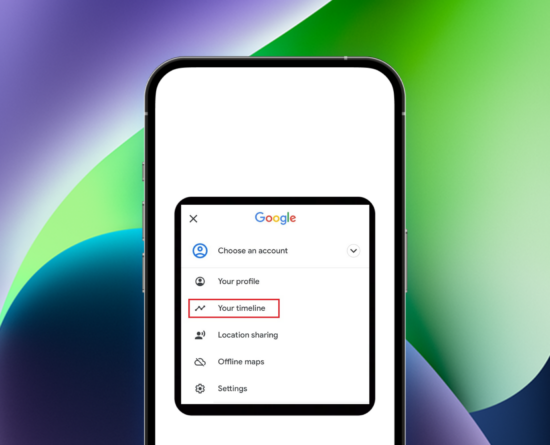
- Tap on the profile icon from the top-right and choose Your Timeline.
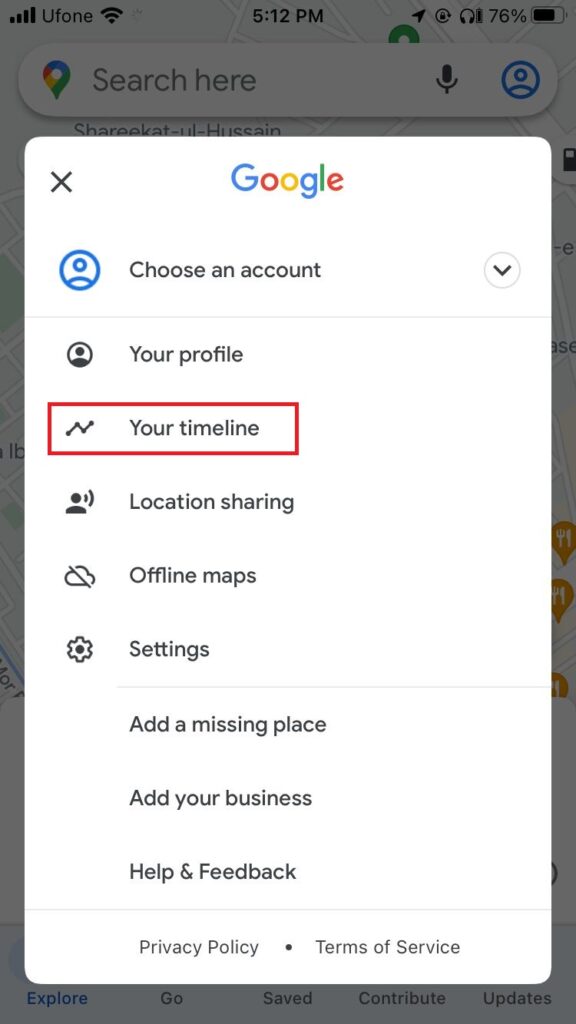
- Afterward, select the three vertical dots icon from the upper-right corner and tap on Settings and privacy.
- Now, tap on Web & App Activity is off.
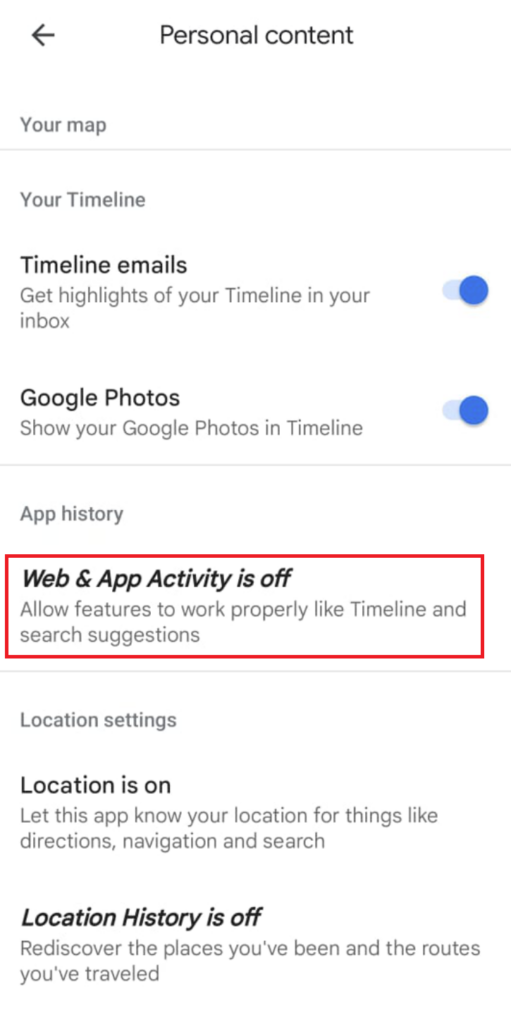
- Finally, select Turn on to enable it.
If this method fails to fix this issue, proceed to the next solution.
6. Enable Background App Refresh For Google Maps.
Sometimes, not using an app for a certain amount of time can automatically disable its background activity. This limits the working of the timeline feature, and hence new locations are not recorded. By allowing Background App Refresh for Google Maps, you can allow it to operate in the background and resolve this issue.
Here’s how you can do it:
- Launch Settings and go to General.
- Then, select Background App Refresh.
- Finally, locate Google Maps and turn on the toggle next to it.
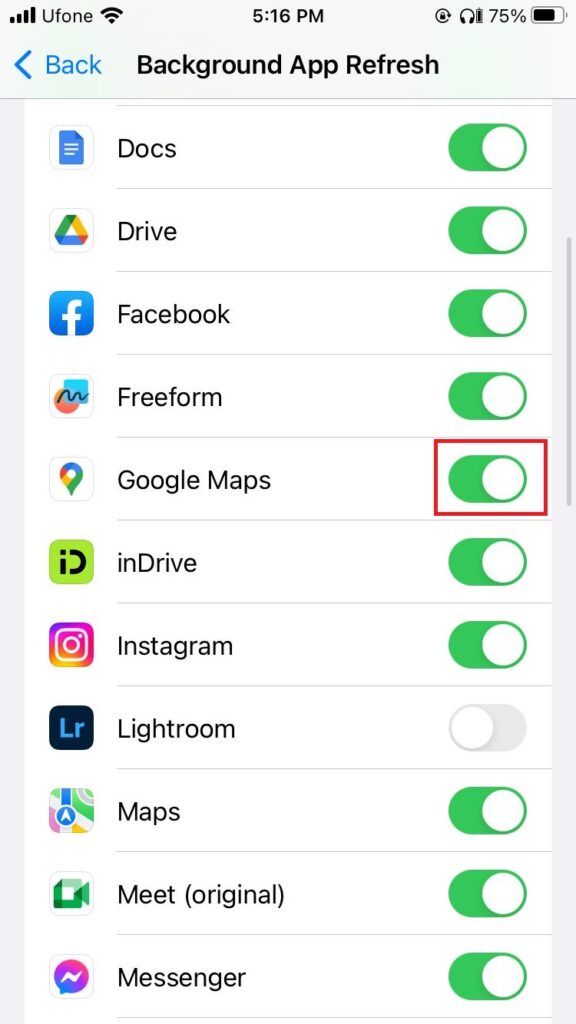
Now, launch Google Maps and see if the issue is fixed.
7. Update Google Maps.
If there is any pending update for Google Maps, it may be why the Google Maps timeline feature is not working. Updating the app to its latest version will remove any bugs in the current version and bring along new features. Therefore, it’s critical to keep Google Maps updated.
Follow the steps below to do so:
- Go to the App Store and tap on the profile icon from the top-right corner.
- Swipe down to the Upcoming Automatic Updates section and locate Google Maps.
- Then, tap on the Update button next to Google Maps to start the updating process.
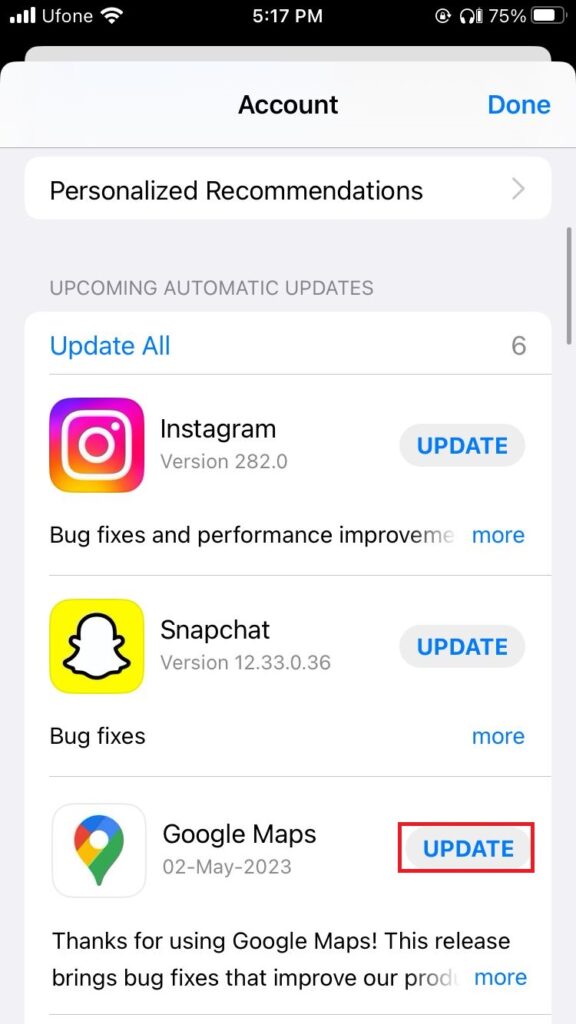
After the Google Maps app is updated, launch it and check if the timeline not working issue is resolved.
8. Update Your iOS Version.
Another reason for the Google Maps timeline feature not working on your iPhone is an issue with the current iOS system. Bugs or errors in the installed iOS version of your device can cause disturbance in the working of several apps. Hence, you must update your iOS to the latest available version.
Perform the following steps to do so:
- Go to Settings and choose General.
- Next, tap on Software Update.
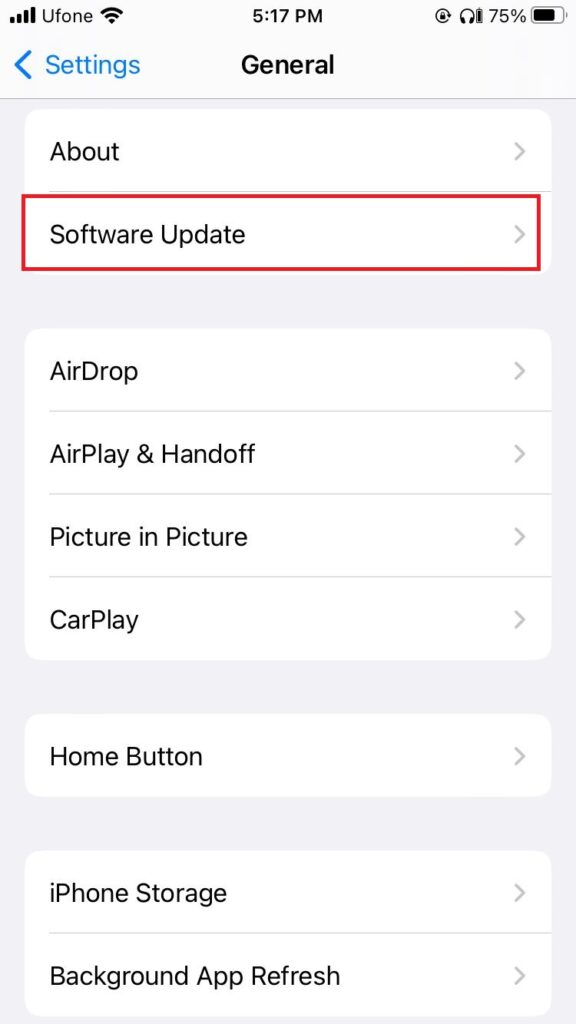
- The screen will load automatically and show you any pending iOS updates, if available.
- Simply tap on Download and Install to begin the installation process.
Now that your iPhone has the latest iOS version, check if the Google Maps timeline not working persists.
9. Reinstall Google Maps.
The final fix, if none of the methods mentioned above prove successful is reinstalling Google Maps. This solution will be effective if there is any issue within the app itself that may be causing the Google Maps timeline feature to not work effectively. By deleting and reinstalling the app, you can ensure there is no such issue.
Reinstall Google Maps in the following way:
- Locate the Google Maps app from your Apple device’s home screen.
- Tap and hold onto it to see the pop-up options.
- Select Remove App from there.
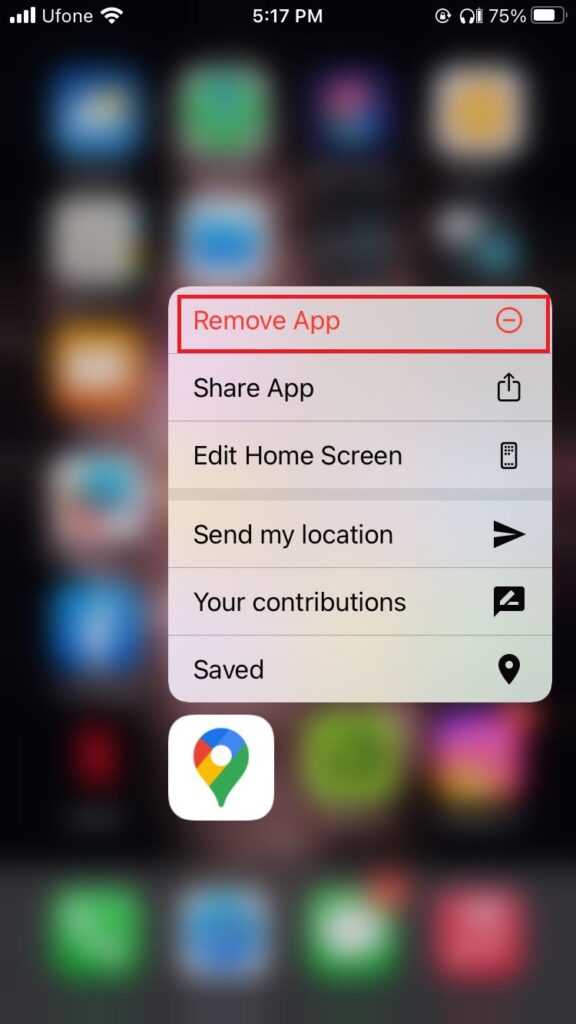
- Then, tap on Delete App from the confirmation box to uninstall the app from your device.
- To reinstall it, head over to the App Store.
- Go to the Search tab from the bottom-right corner and search for ‘Google Maps’ using the search bar.
- Finally, tap on Get next to Google Maps to reinstall the app.
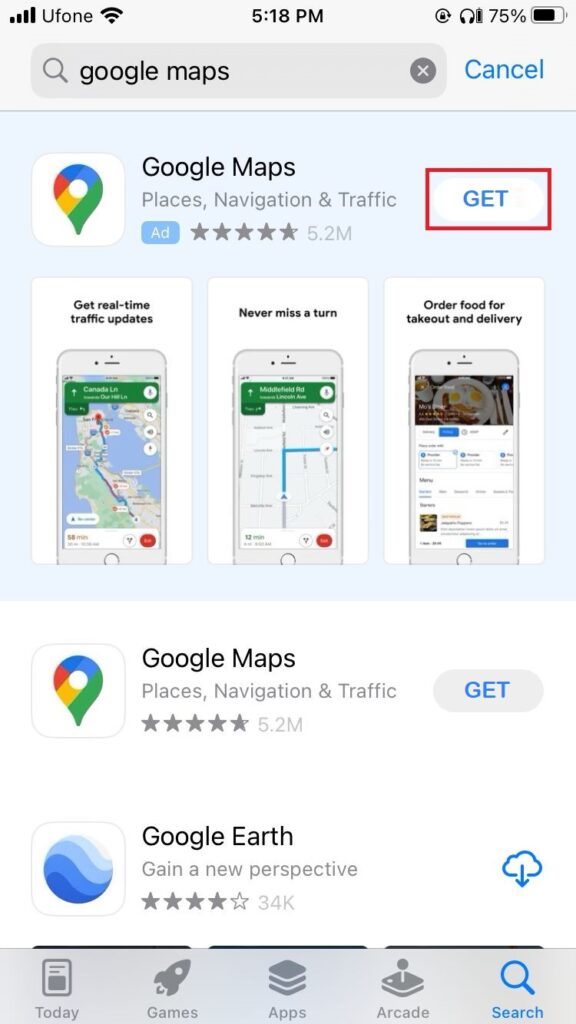
Once you’ve reinstalled the app, open it and check if the timeline is working correctly.
This brings us to the end of our guide on how to fix Google Maps Timeline not working on iPhone. If you have any other queries, please use the comments section below to let us know. We’ll be happy to provide further assistance.
If this guide helped you, please share it.


