

Can’t watch the next episode of your favourite show on your Apple TV+ because it says “Video Unavailable”?
Several users have reported seeing the “Video Unavailable” message when trying to watch a movie or show using the Apple TV+ app installed on their smart TVs or Media Streaming Sticks. Some have tried to ask their fellow Apple TV app users on the Apple Support Community page for a possible fix.
Now there are a lot of factors to consider when troubleshooting such kind of issues. It may be because of a connection problem, system settings conflict or a software glitch. Of course, it will also vary because everyone uses a different device when using the Apple TV+ app.
But don’t worry, we are here to help fix your Apple TV Plus ‘Video Unavailable’ issue.
Apart from guiding you step-by-step with the various tried and tested solutions which we’ve found, we have also included the workarounds when a permanent fix is not applicable for your device. Regardless, by understanding the cause of the issue, you may also be able to derive your own fix for your device.
Let’s get started!
- 1. Test Your Internet Network Connection
- 2. Check Your DNS Settings
- 3. Verify Your Apple ID
- 4. Start the Video on Your iPhone or iPad
- 5. Reset Connection Settings
- 6. Re-Install App and Sign Back In
- 7. Talk to Apple Support
1. Test Your Internet Network Connection.
One of the most popular reasons why you may be seeing the ‘Video Unavailable’ message on Apple TV+ is because of a network connection problem.
Whenever you try to access and watch a show on Apple TV+, it tries to connect to the Apple TV server via the internet to stream these videos for you. But if your internet is not reliable or inconsistent, this problem may occur.
To check the consistency of your internet connection, first, try to do a Ping test using your browser. If you see zero’s or a ‘timed out’ error, then you will need to call your internet service provider (ISP) to fix it.
The same thing goes if your internet bandwidth is below your allocated capacity. You can check it using an internet speed test on your browser as well.
As per Apple TV+ requirements, here are the recommended internet bandwidth speeds:
- 4K movies require a recommended speed of 25 Mbps
- 1080p HD movies require a recommended speed of 8 Mbps
- 720p HD movies require a recommended speed of 6 Mbps
- SD movies require a recommended speed of 2.5 Mbps
However, if all your tests are good and you still have the same issue, then there may be a service outage in your area. Even if you have a more than good connection, a service outage can cause inconsistencies in how the network works for you. To understand if there are any local network service outages, again you will have to get in touch with your ISP.
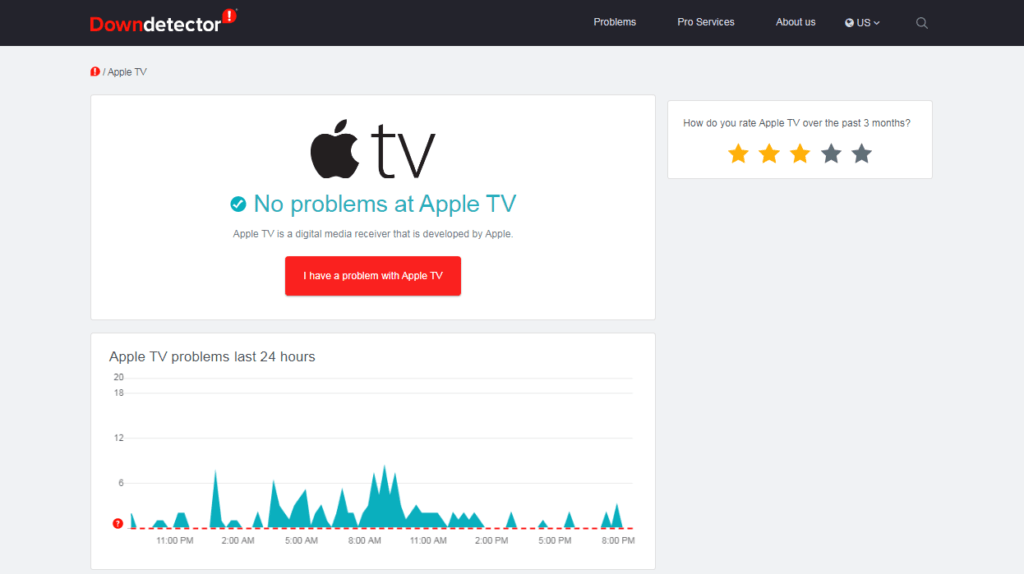
On that note, it can also be a service outage from Apple’s end. You can check the status of the Apple service in your area using Apple TV down detector tool on your browser. If the status is down at the moment, you will need to wait for a while until it goes back up.
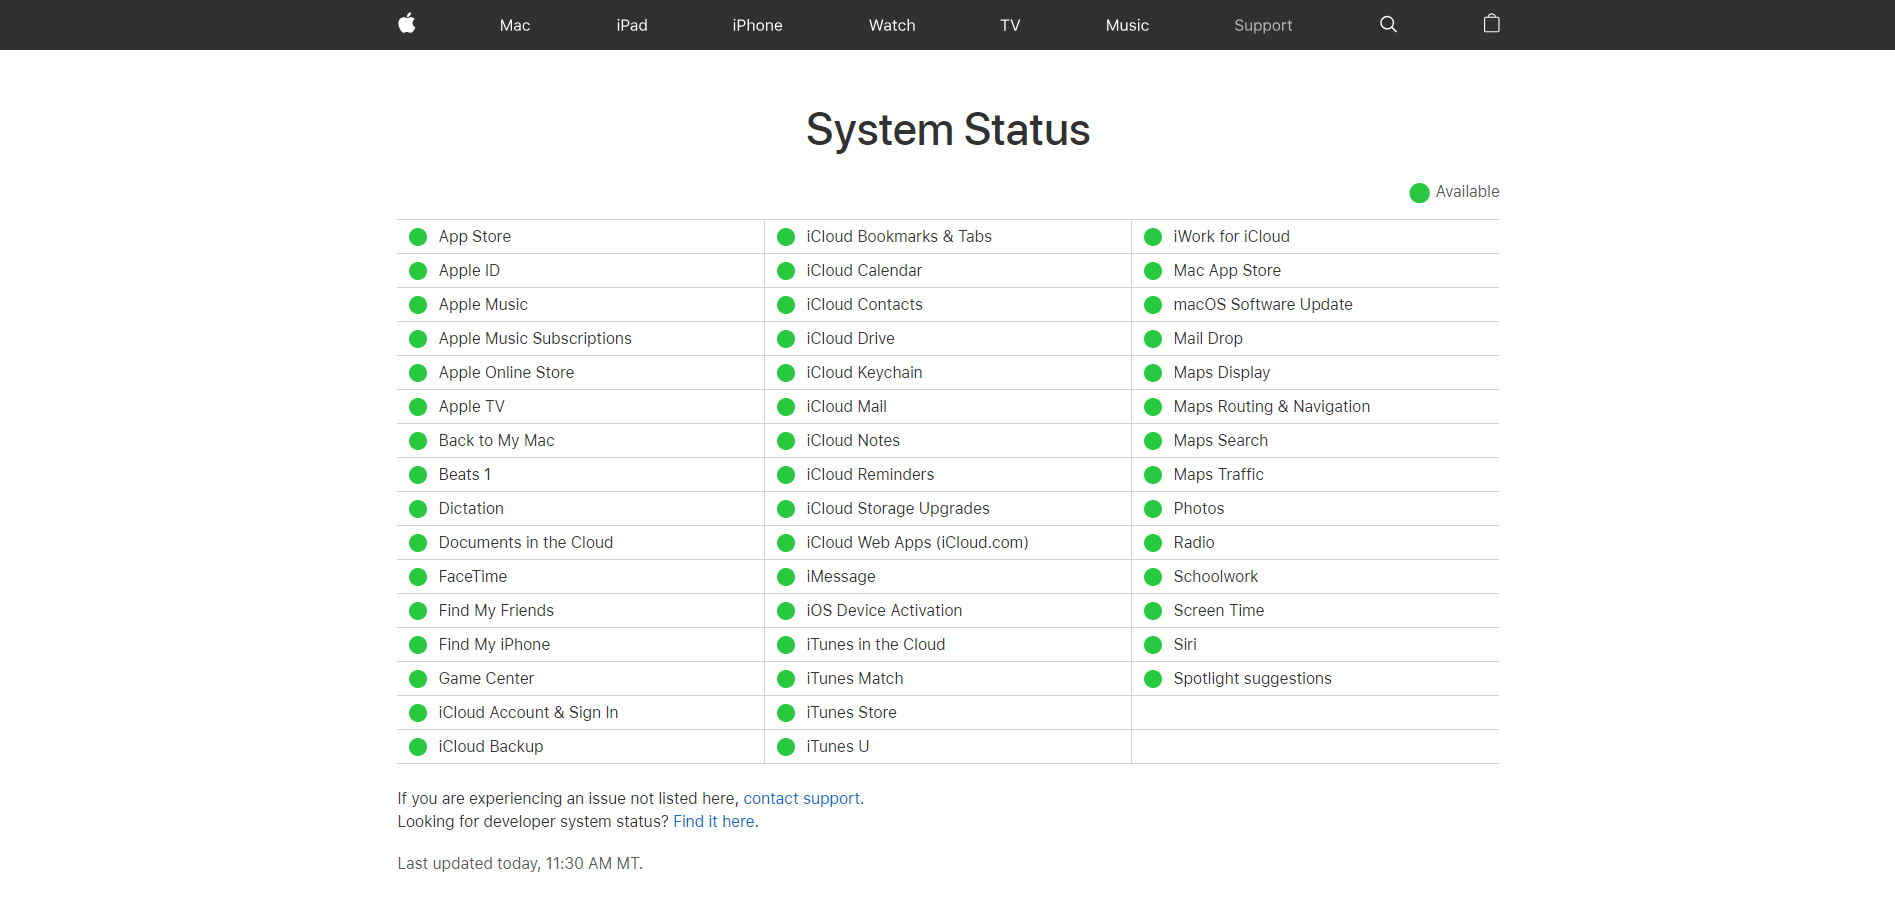
Alternatively, you will also want to check Apple’s System Status page to see if Apple TV+ is particularly down (which will be indicated by either a yellow 🟡 or red indicator 🔴).
2. Check Your DNS Settings.
Domain Name Service (DNS, in short) is a protocol used by all devices connected to the internet. It helps your device translate the domain name (for instance, www.apple.com) to internet protocol address (17.172.224.47).
These numbers are network addresses which a computer network understands; allowing our data to be transmitted to the correct and rightful owner.
Having the wrong DNS server on your device means that your device could not locate the video file address on the Apple TV server.
Here’s how you can fix it on your Apple TV:
- Go ahead and open the Settings on your Apple TV menu.
- Then, choose Network, then select Wi-Fi on the top screen.
- Next, choose your Wi-Fi network and click on the Configure DNS option.
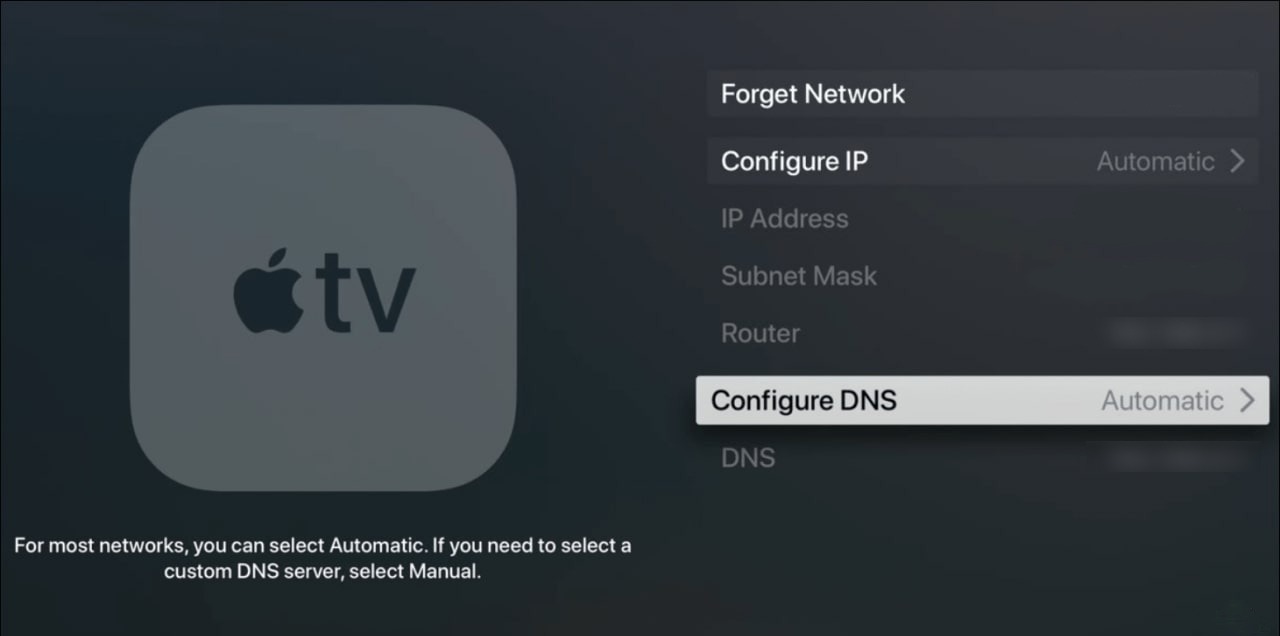
- Finally, set the value to Automatic so it will obtain the settings from your internet provider.
If you are using a third-party device where you install the Apple TV app, you need to call the manufacturer’s support. You will need to ask them how you could check the DNS settings of your device.
After you set up the correct settings, you should be able to view your favourite TV shows without issues.
3. Verify Your Apple ID.
It is also possible that the Apple ID you used to sign in to your Apple TV is the wrong one.
Some people get confused especially if they have more than one Apple ID.
One possible scenario is that you purchased these shows or movies using your primary Apple ID. In which case, you will not be able to view these videos on your Apple TV if you signed in your secondary Apple ID account.
To be sure, sign-out your Apple ID and sign back into the right one.
Here’s how you can do it:
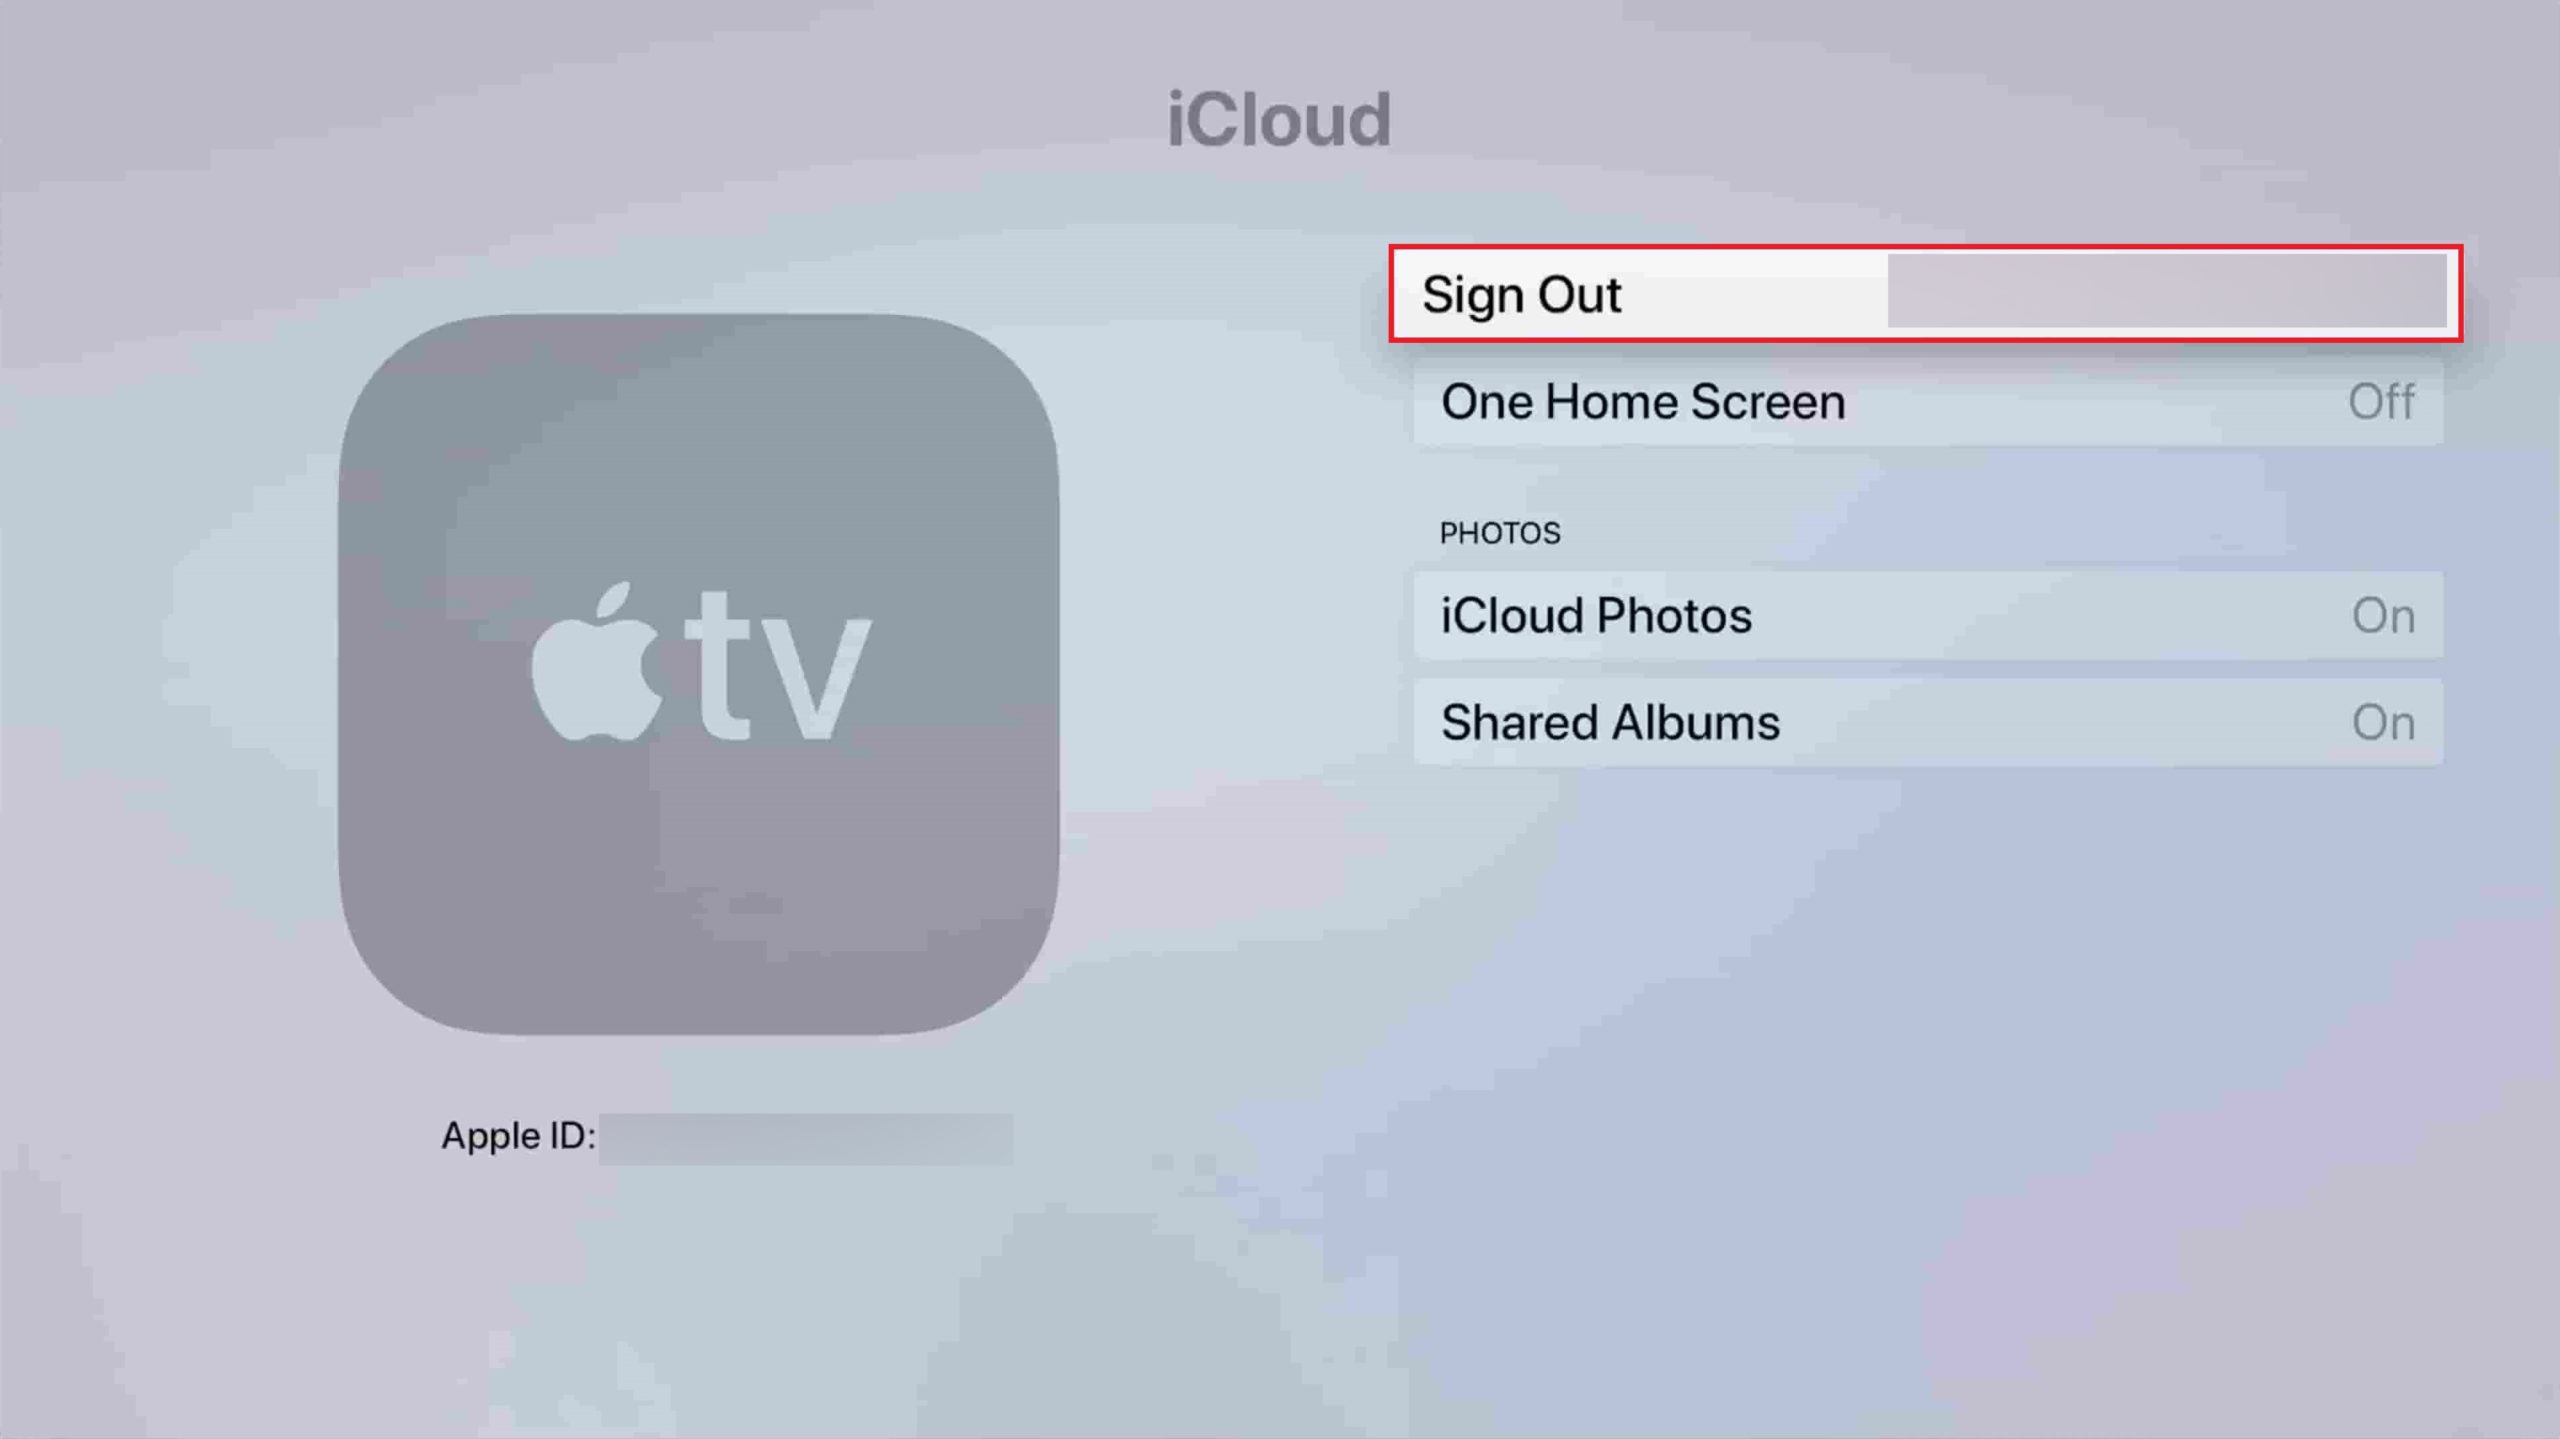
- Go ahead and open the Settings of your Apple TV.
- Then choose the iCloud option and choose your account name.
- Now, Choose the Sign Out option and restart your Apple TV.
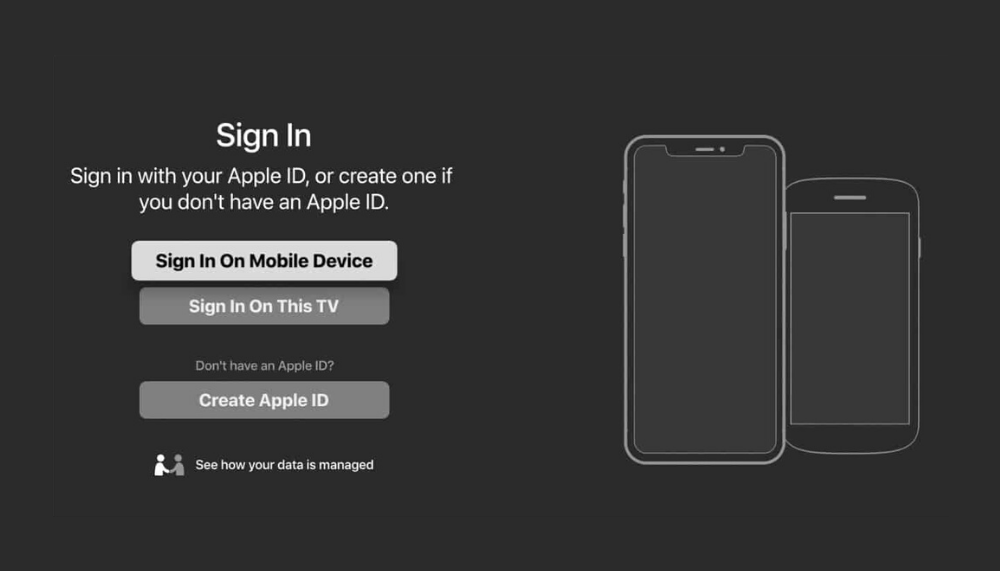
- After your Apple TV is back on, go back to the Settings.
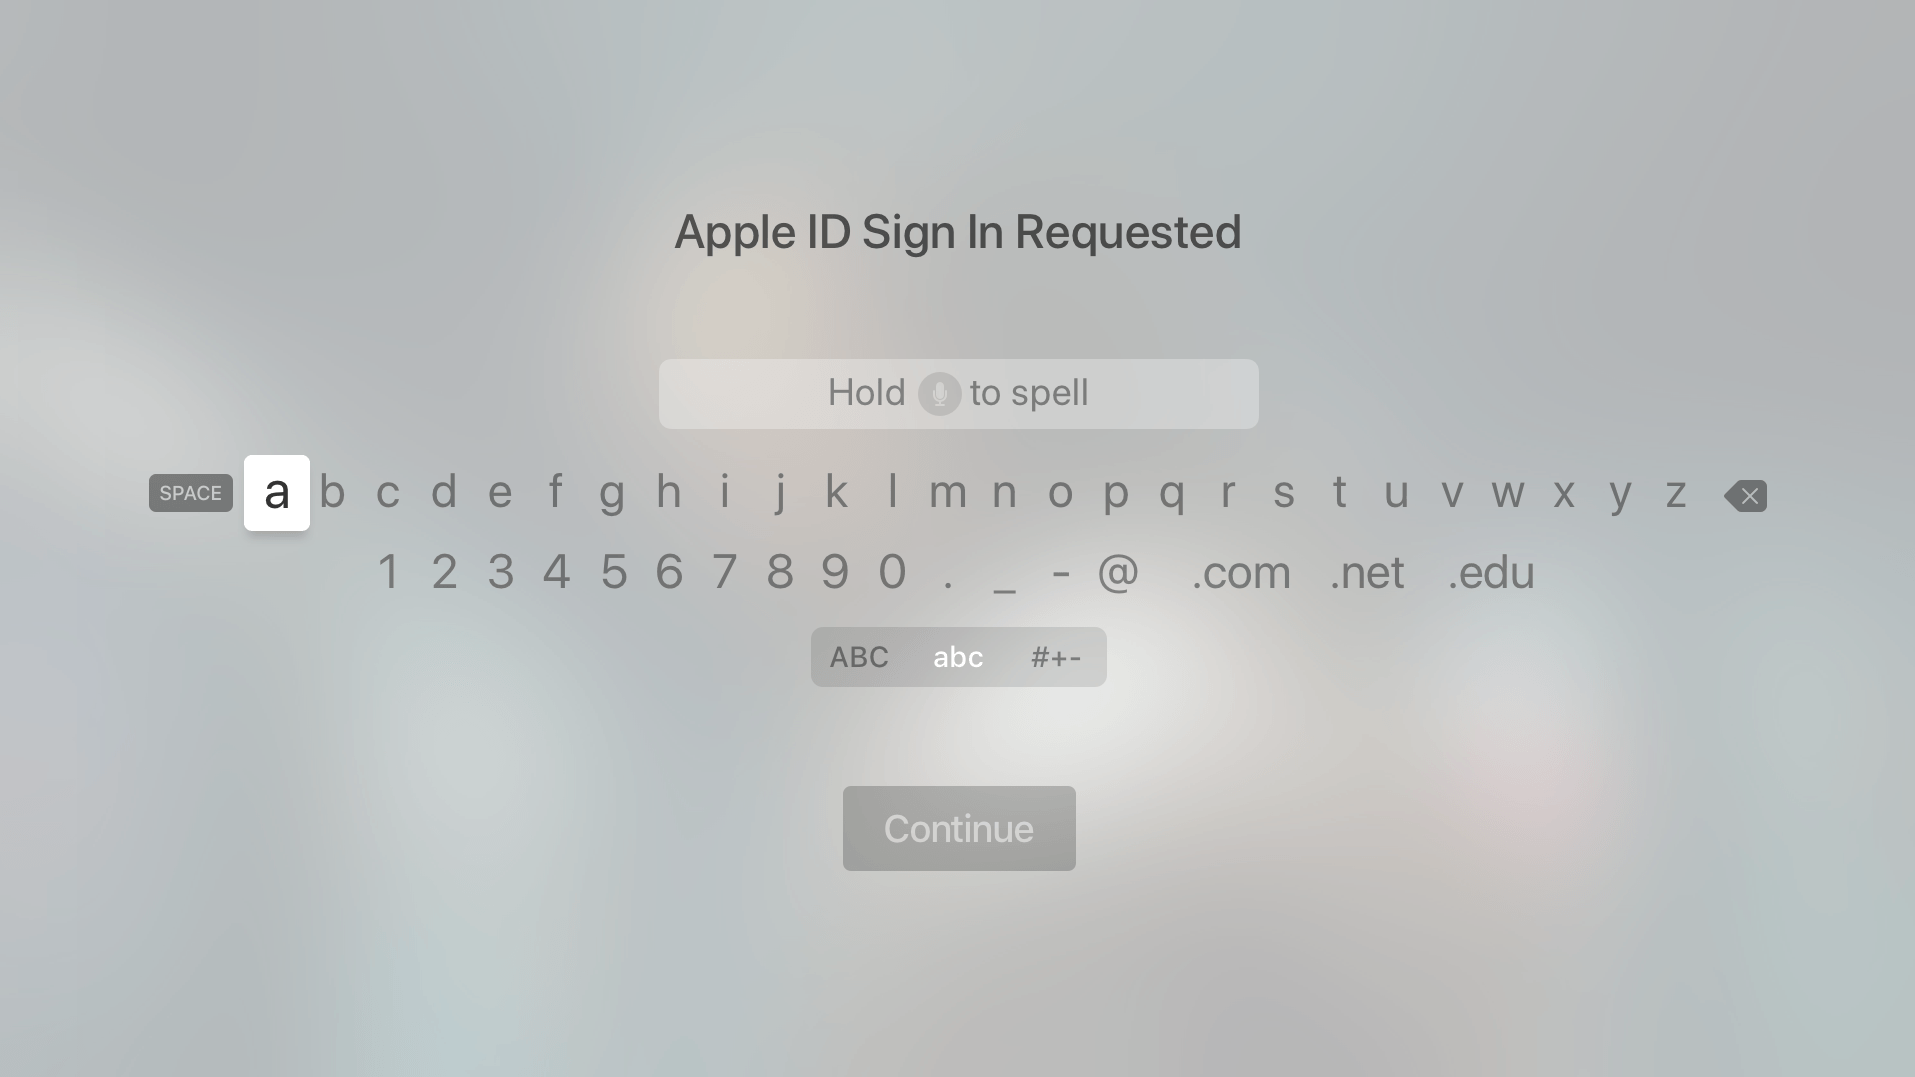
- Finally, choose the iCloud option and sign back on your Apple ID.
Now that you have made sure that you are using the correct Apple ID, you should be able to play the movies or shows you purchased. M
Again, if you are using a third-party device, you can go to the Settings of your Apple TV+ app. Then, go to the Accounts and then Sign-out your Apple ID. Restart your device after that.
If you are using a media stick such as Roku or Chromecast, then make sure to shut down, unplug and re-plug it for the restart process. After that, sign back in, and try testing to see if it works.
4. Start the Video on your iPhone or iPad.
If you are still experiencing encountering the ‘Video Unavailable’ message on Apple TV+, then there is an immediate workaround for this issue.
What you can do is open the movie or show that you want to watch on your iPhone or iPad.
Start the video and then pause it (select the Pause button).
After that, go back to your Apple TV app on your third-party device and play the same video. You should be able to play the video now. This trick has been found to have worked for a few users.
If you see the ‘Video Unavailable’ error again when playing the next video, just repeat the method.
5. Reset Connection Settings.
Another possibility is if your third-party device connection settings get corrupted.
This usually happens when your device was abnormally interrupted (not shutting down properly or terminating in the middle of a system update), and the data settings were not saved.
One particular third-party device that is popular today is the Roku media stick. To rebuild the corrupted settings on this device, you will need to reset the connection settings.
Here’s how you do it on the Roku media stick:
- Go ahead and make sure that the Apple TV+ app is installed and your Apple ID is signed in on your Roku device.
- Then, on the Roku home screen, go to the Settings and then choose the System option.
- Next, choose Advanced system settings, then select Network connection reset.
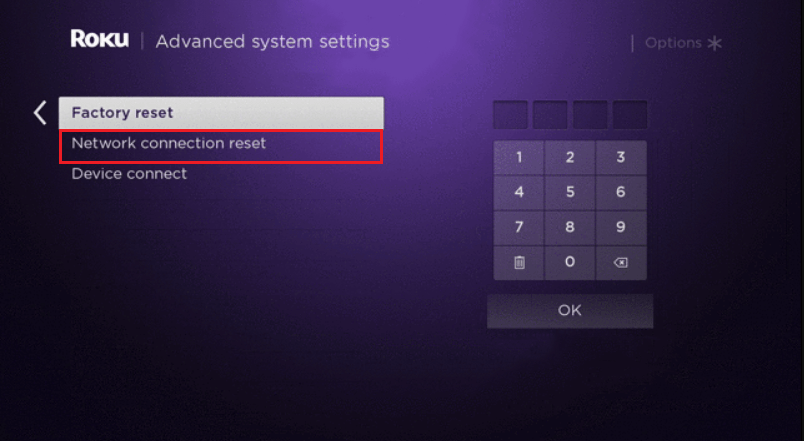
- Now select Reset connection.
- Now, choose the Reset the connection option.
- Finally, wait for the device to finish rebooting and then connect it back to your Wi-Fi network.
If you have a similar device, you can use this method as a reference on how to reset the network settings. If you are not sure, simply google on how to reset the network connection for the device, and you should be able to obtain the steps.
Once you have done this method, you should be able to stream the videos successfully.
6. Re-Install App and Sign Back In.
Uninstalling and reinstalling the Apple TV+ app can potentially help to fix the ‘Video Unavailable’ issue. This is because whenever you reinstall the app, a new, updated version of the app is installed onto your device without any settings misconfiguration or bugs.
Again we will be showing how it is done on a Roku device (particularly the Roku Media Stick). The steps below can be a good reference if you’re on a similar device to uninstall the Apple TV+, restart the device and re-install the application. If you do find yourself lost, simply google the steps on how to reinstall an app on the device, and you should be able to follow through. 🙂
Here’s how you can reinstall an app on a Roku Media Stick:
- Go ahead and go to the Home Screen on your Roku Media Stick.
- Then, navigate to the right until the Apple TV+ app is highlighted.
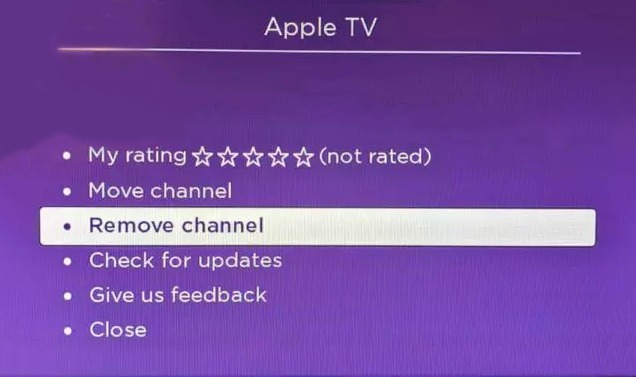
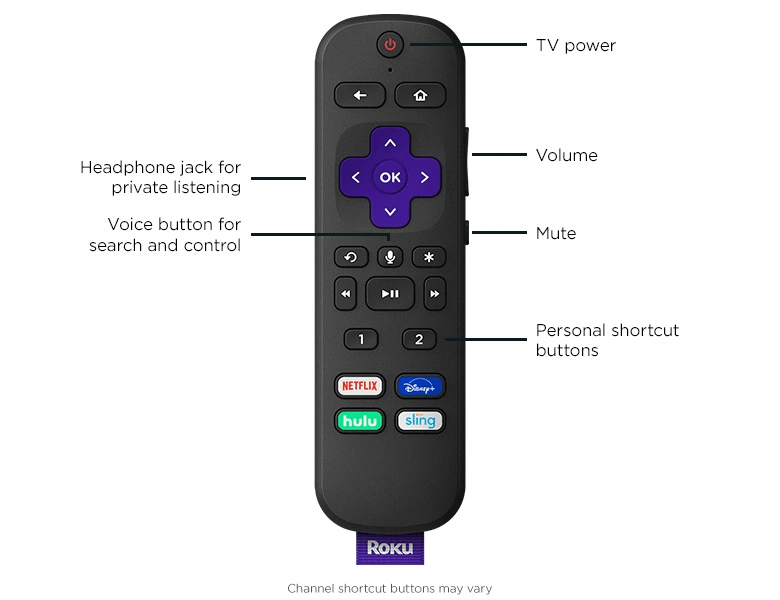
- Next, press the Star icon button on your remote for the Option available.
- Now, choose Remove Channel and confirm the process by selecting Remove again when prompted.
- Restart the device by pressing the Home button five times, then Up arrow once, then Rewind button twice, and then Fast Forward button twice. Alternatively, you can also just go into your Settings > System > System restart > Restart.
- After the restart, go back to the Channel store and download the Apple TV+ app again.
- Finally, launch the Apple TV+ app and sign back in your Apple ID.
Once you’re done, test by playing any video in the Apple TV+ app and you should be able to watch the video without any errors.
7. Talk to Apple Support.
If you still have issues with our Apple TV+ device or app, make sure to get in touch with Apple Support. You may inquire about the compatibility of the Apple TV app as well if you are using third-party devices. Since Apple is usually focused on its proprietary devices, make sure to ask them first before purchasing these devices. With this, you can avoid having problems with compatibility.
But if you have issues or suggestions with regards to Apple TV+, you can send them a feedback on their website. They can use your data and all other data on Apple TV+ on how to enhance the system.
We hope that as you finished reading this article, you were able to fix your Apple TV+ video unavailable issue. If you have questions related to this topic, please feel free to leave a comment below.
If this guide helped you, please share it. 🙂