Constantly getting the No Power options available error on Windows 11?
While some individuals use the Power button on the keyboard to shut down their computers, many use the Power options through the Start menu. However, if you encounter the “There are currently no power options available” error on Windows 11, you’ve come to the right place.
This error can be really frustrating as it prevents you from shutting down your computer, restarting it, or even putting it into sleep mode. Although there are various causes for this error, the main ones are a damaged system file or a Windows update gone wrong.
Although do not fret, you can quickly overcome this issue with any of the methods mentioned in this guide. So, let’s get started!
1. Run Windows Power Troubleshooter.
Windows has several in-built troubleshoots to help you diagnose and resolve the issues you encounter every once in a while. The Power options also have their dedicated troubleshooter that will automatically fix most of the issues related to your computer’s Power plan.
So to start off, we recommend you refer to the default tool and see if that fixes your problem. Here’s how to run this diagnostic test:
- To get started, press the Windows key + i from your keyboard to open Settings.
- From the left pane, go to System.
- Then, go to Troubleshoot from the right pane of the window.
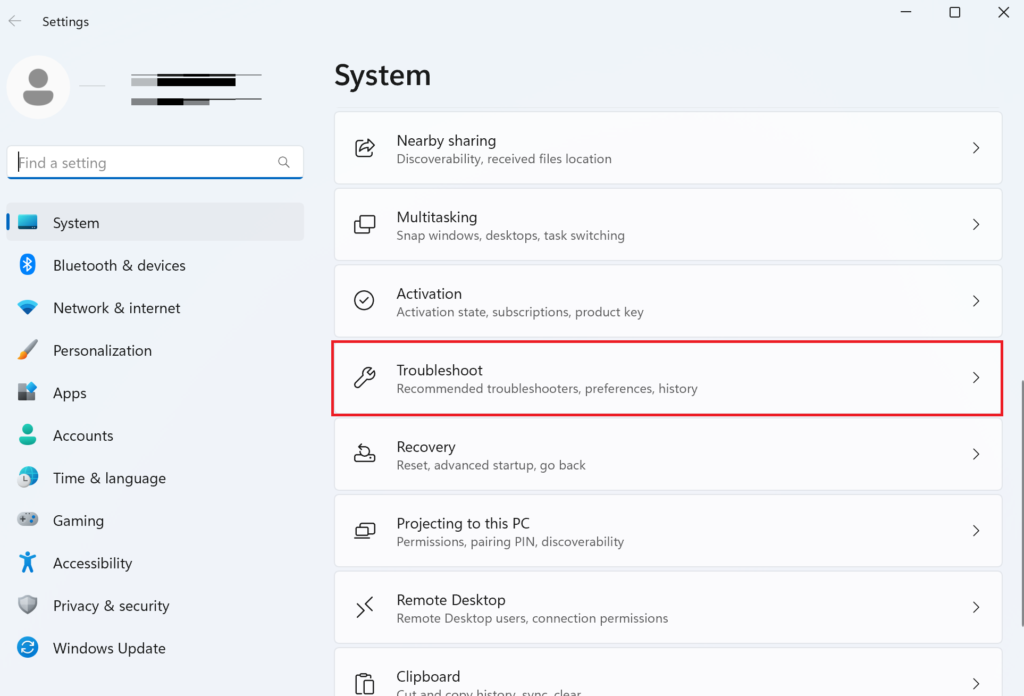
- From there, go to Other troubleshooters.
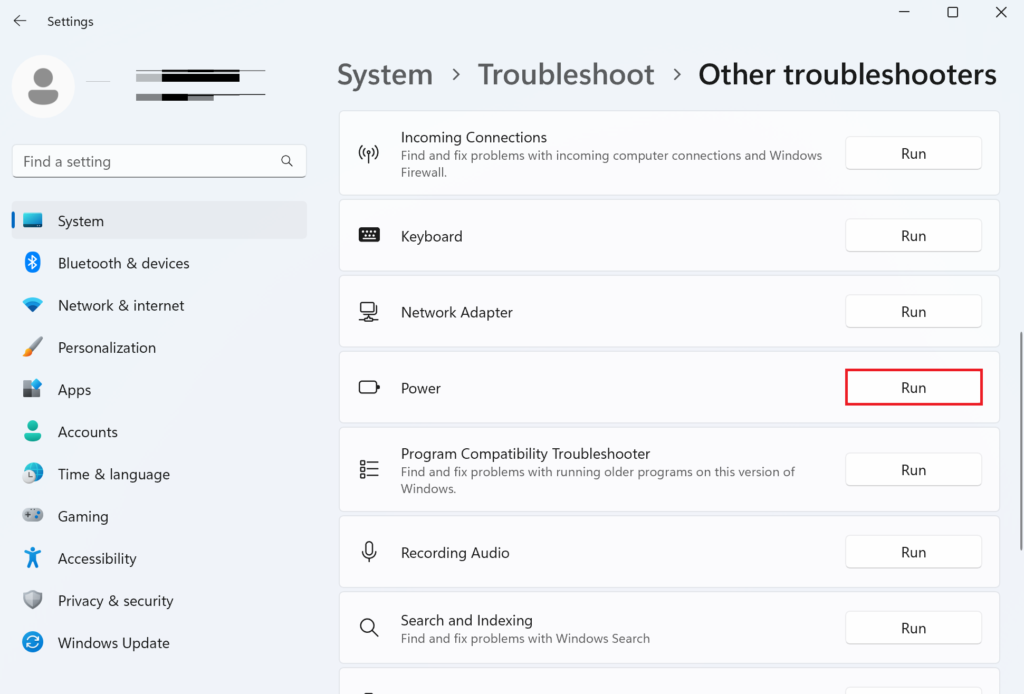
- Finally, scroll down to Power and click on the Run button to start troubleshooting.
2. Use the Local Group Policy Editor.
Windows 11 features an option that allows or prevents users from making changes to the Power options. If someone else or you have accidentally enabled this option, it could be why you’re getting the No Power options available error on Windows 11.
To disable it, use the instructions below:
- Firstly, press the Windows key + R to open the Run utility.
- In the search field, type gpedit.msc and click OK.
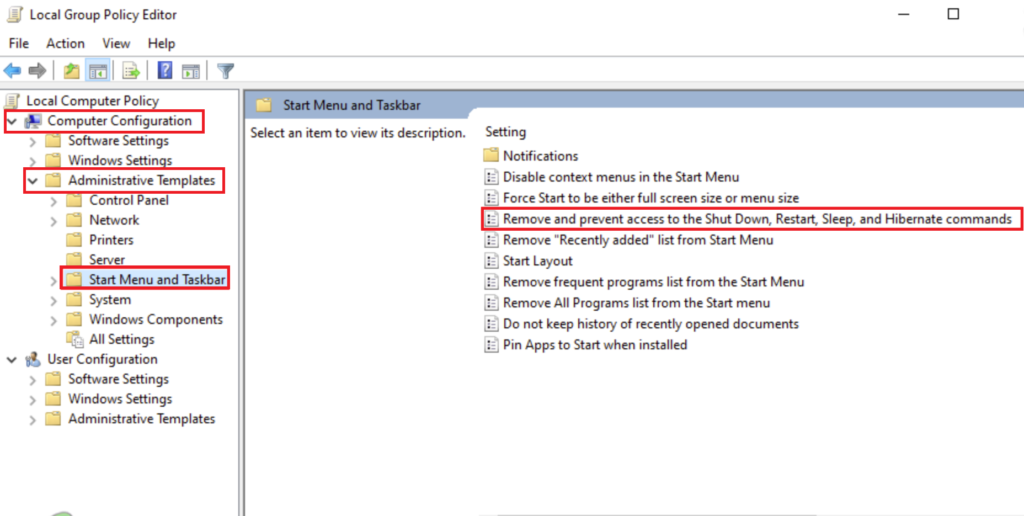
- When the window opens, navigate to the following path:
User configuration > Administrative Templates > Start Menu and Taskbar - On the right side, look for Remove and prevent access to the Shut Down, Restart, Sleep, and Hibernate commands. If it says Enabled, double-click on it.
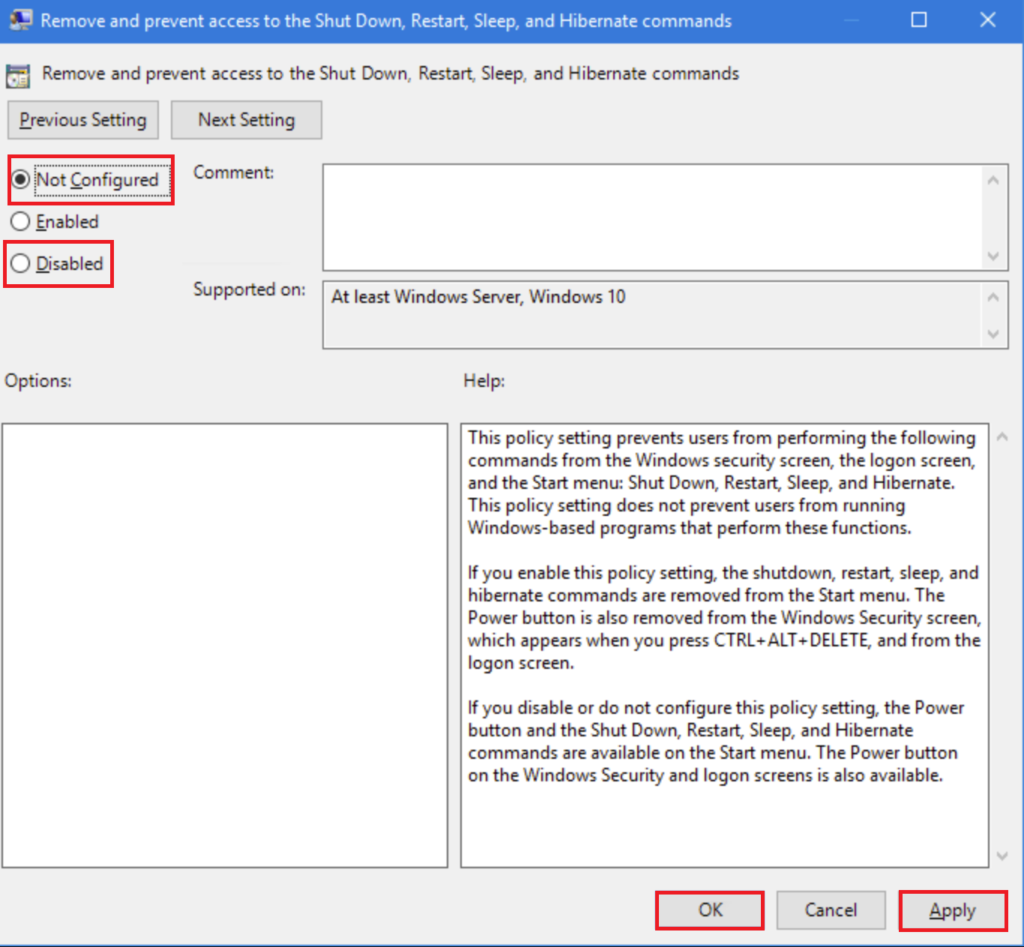
- A pop-up window will appear. From there, choose Not Configured or Disable.
- Then, click Apply and OK to save the changes.
If the changes are still not applied, consider restarting your system.
3. Edit Windows System Registry.
The previous method is unfortunately not available to PCs running on Windows 11 Home. In that case, you can use the Windows Registry to disable the option that prevents you from making changes to the Power options.
Here’s what you need to do:
- Open the Run dialog box by pressing your keyboard’s Windows key + R.
- Type regedit and hit Enter.
- If the User Account Control box appears, click OK.
- When the window opens, navigate to the following path:
HKEY_CURRENT_USER\Software\Microsoft\Windows\CurrentVersion\Policies\Explorer- From the right pane of the window, double-click on NoClose.
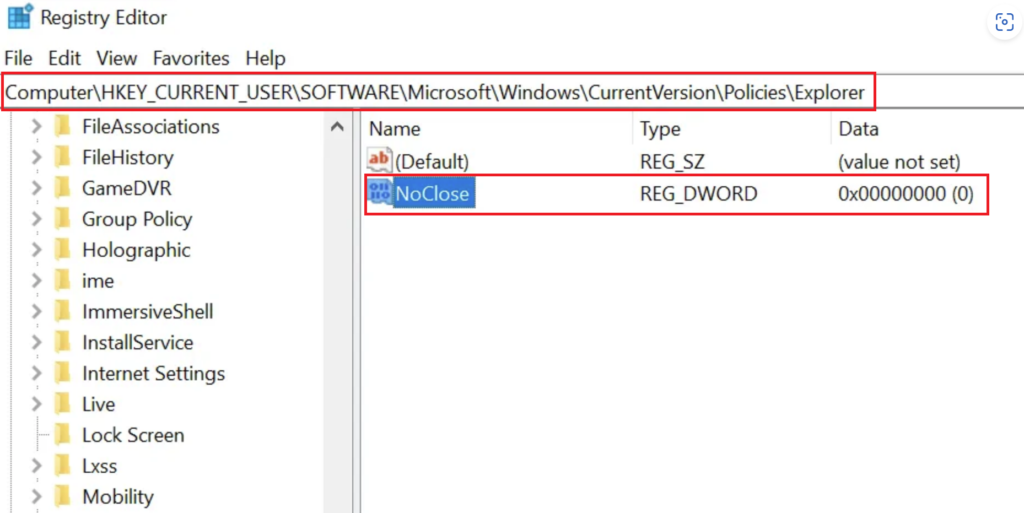
- In the Value data field, type 0 and click OK.
- Restart your PC to apply the changes.
If the problem persists, try other fixes explained below.
4. Restore Default Power Settings Via Command Prompt.
In case you recently made changes to your computer’s Power plan, this could be why you’re getting the No Power options available error on Windows 11. Misconfigured settings lead to all sorts of issues that can only be fixed once you restore your system settings to default.
Follow the steps below to do it:
- Begin by searching for Command Prompt in Windows Search and clicking on Run as administrator.
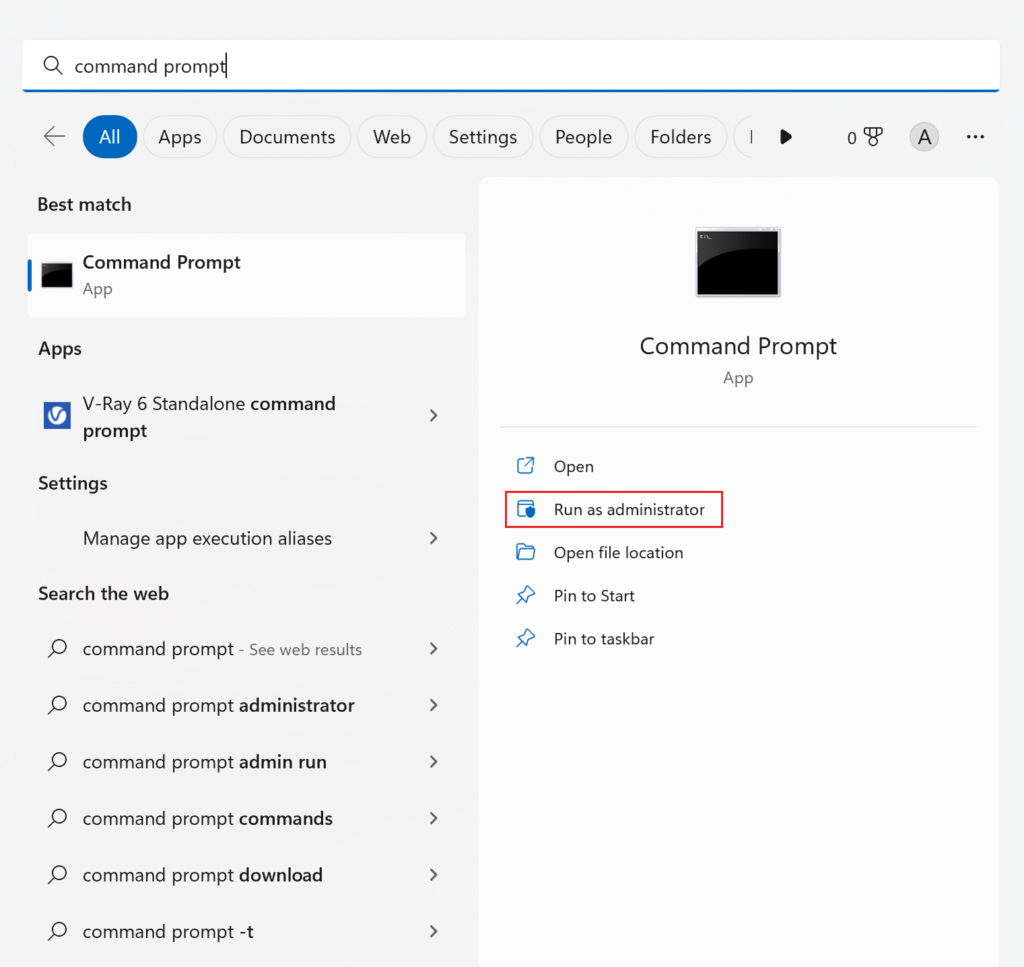
- When the User Account Control box appears, click Yes.
- In the prompt window, run the following command:
powercfg -restoredefaultschemesThis should successfully reset your Power plan to default.
5. Perform SFC and DISM Scans.
Corrupt or missing system files are another reason you may face the No Power options available error on Windows 11. These files can encounter issues due to various reasons, most notably a malware attack.
But don’t fret. You can repair these files by performing the two built-in command line tools known as the SFC and DISM scans.
Here’s what you need to do to run an SFC scan:
- First, use Windows Search to search for Command Prompt and click on Run as administrator.
- If the User Account Control window pops up, click Yes.
- When the prompt launches, type the following command and hit Enter:
sfc /scannowWait for the scan to complete and your files to get repaired. Afterward, run the DISM scan by following the steps below:
- Search for Command Prompt in Windows Search and click on Run as administrator.
- Click Yes on the User Account Control window.
- Then, run the following commands one by one in the prompt:
DISM /Online /Cleanup-image /ScanhealthDISM /Online /Cleanup-Image /CheckHealthDISM /Online /Cleanup-Image /RestoreHealthAfter performing both scans, restart your computer to see if the issue has been resolved. Otherwise, move to the following methods.
6. Use System Restore.
If you recently installed an application or made changes to your PC’s settings, you might have messed up the functionality of the Power options. If you’ve created restore points earlier, you can simply restore your system back to that saved point. This will discard all the changes made after that, hopefully bringing back the Power options as well.
7. Update/Roll Back Windows OS.
An outdated or incompatible Windows OS is another reason for various conflicts within your system. In case your computer is running on an outdated OS, follow the steps below to install the latest version available:
- Press the Windows + I keys to launch the Settings app.
- From the left pane, go to Windows Update.
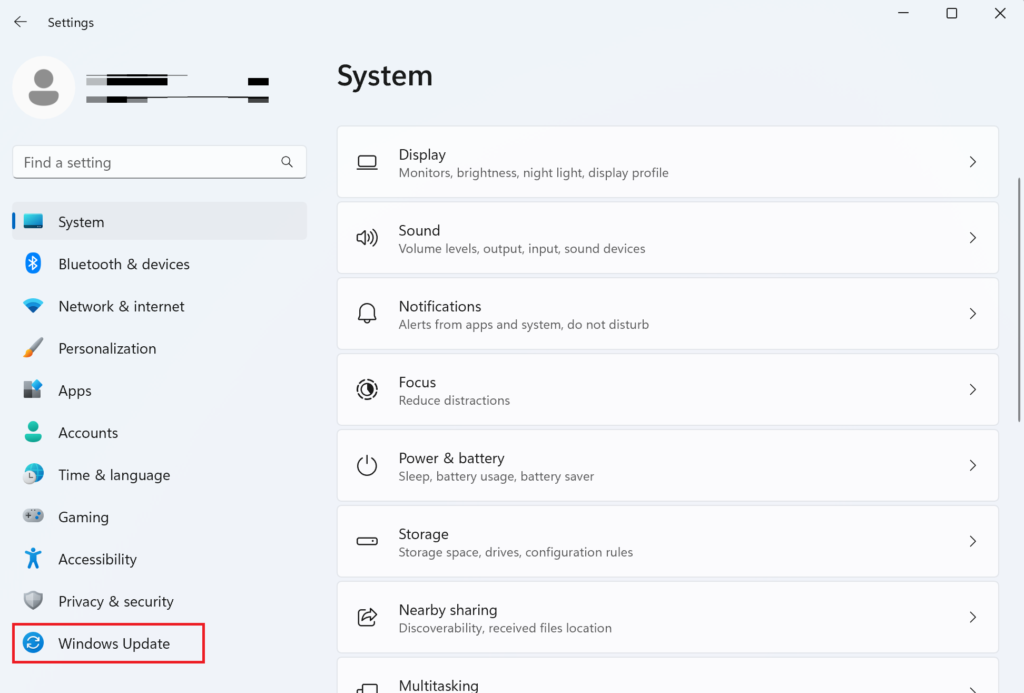
- Then, click on the Check for updates button on the right pane.
- If there is any update available, click on Download and Install.
However, if you recently installed a Windows Update, we recommend returning to your previous Windows version. Here’s how:
- Click on Settings from the Start menu and go to the Windows Update tab.
- From the right pane, click on Update history.
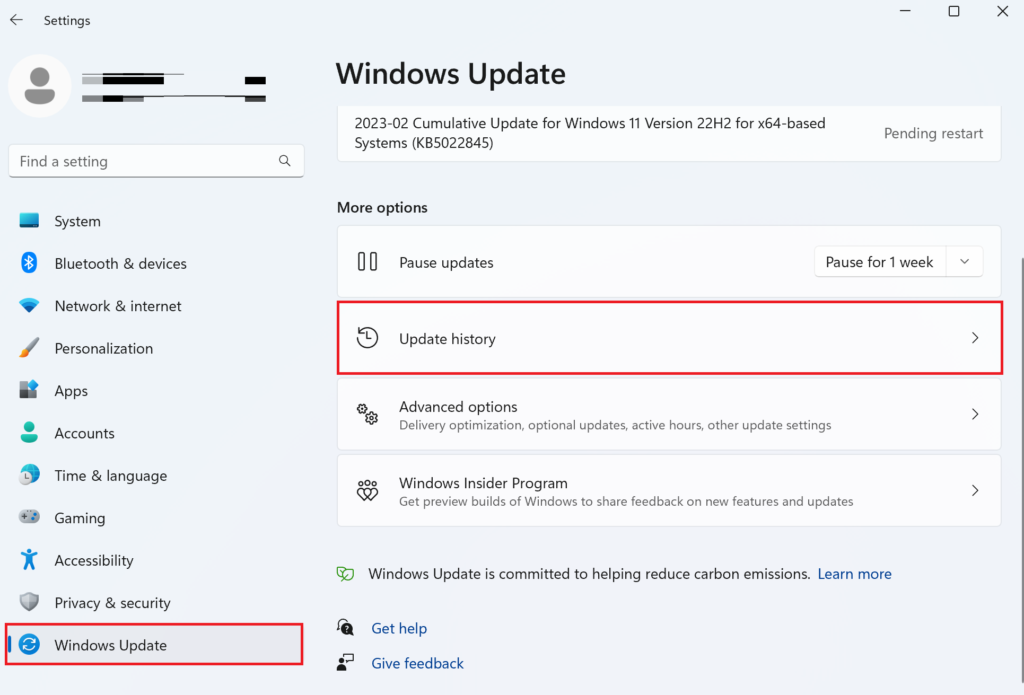
- Then, click on Uninstall updates under Related settings.
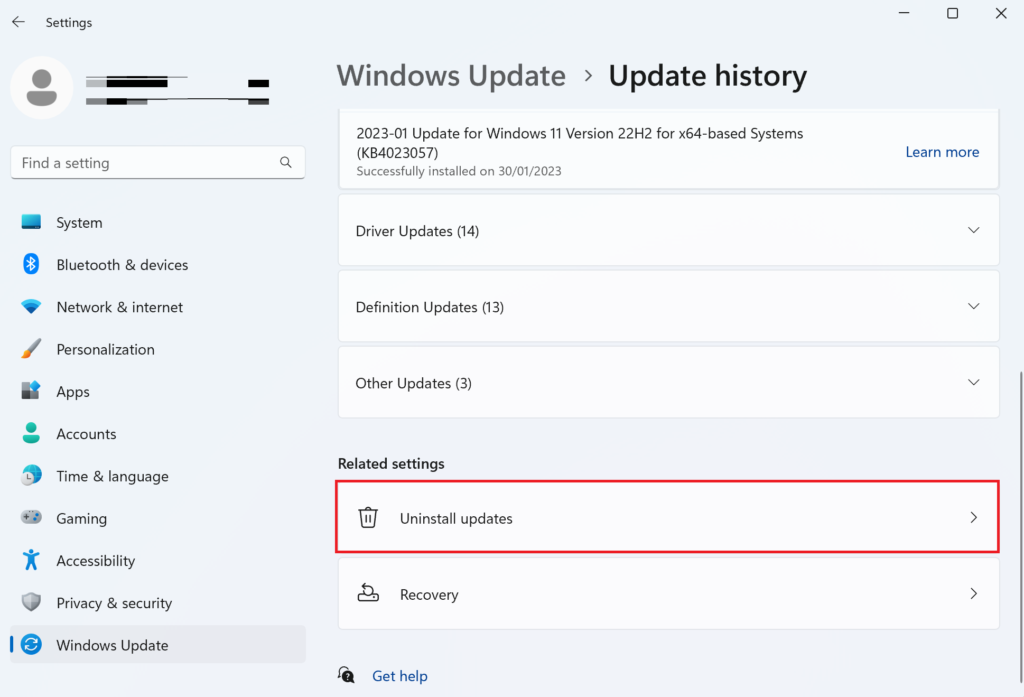
- This will display all the updates installed on your PC. Click on Uninstall next to the update you want to remove.
- Again, click on Uninstall to confirm your action.
8. Reset Windows.
When all methods fail to work, your last resort is to reset your PC. It will bring all your settings to their default. When you do so, Windows asks you to keep all your files and data or remove them. We recommend you keep a backup of your data, irrespective of the option you choose, just to be safe.
Afterward, follow the steps below to reset your PC:
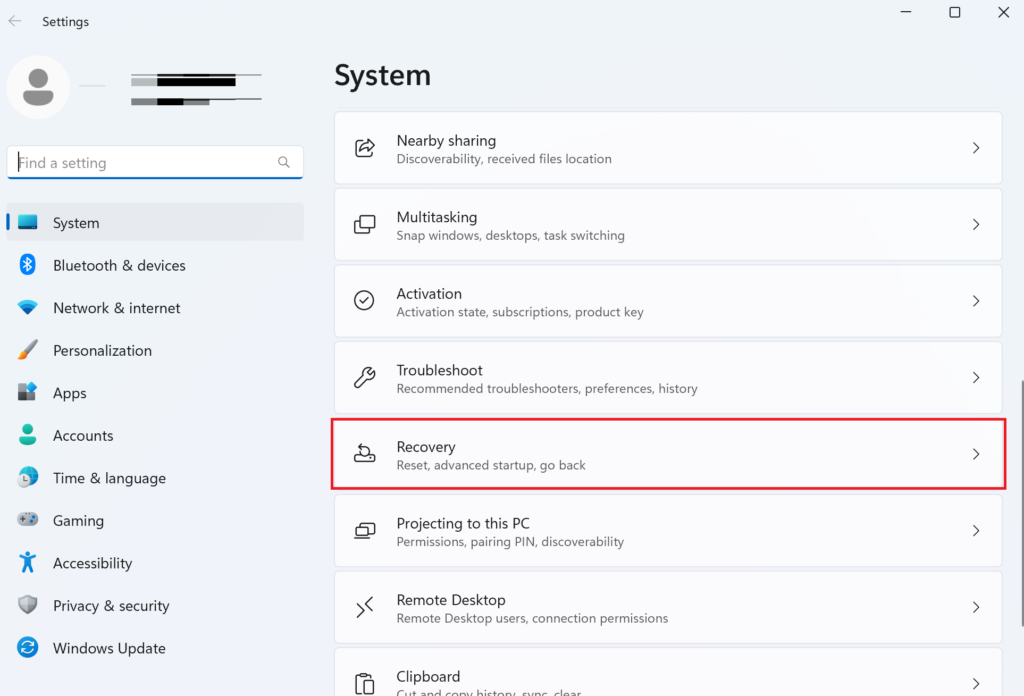
- Open Settings from the Start menu.
- From the System tab, go to Recovery.
- After that, click on Reset PC next to Reset this PC.
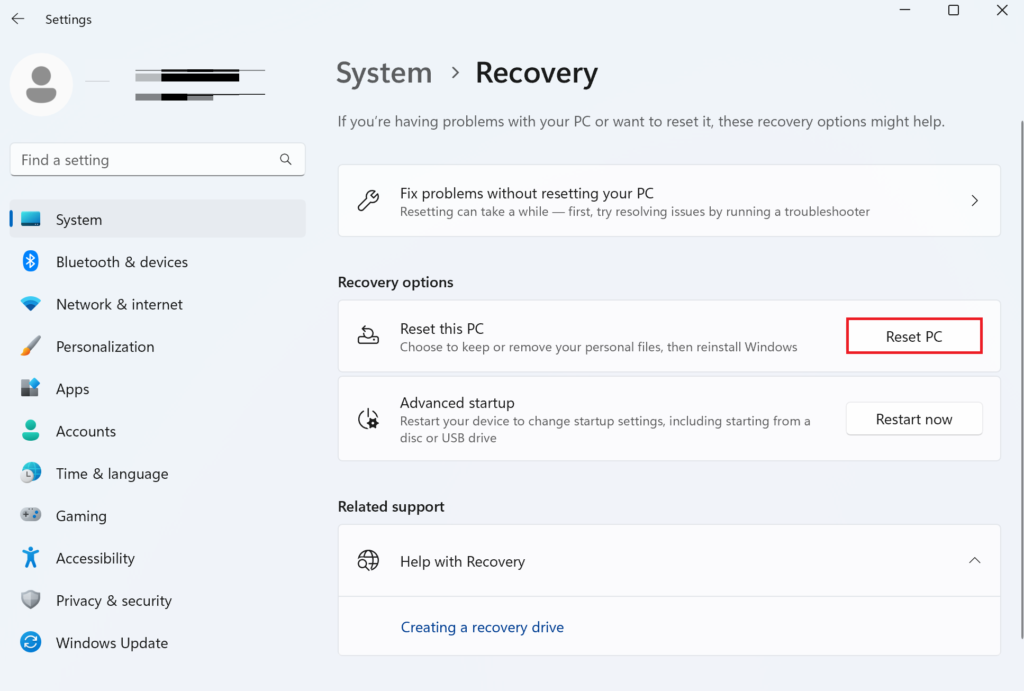
Continue following the on-screen instructions to reset your computer.
That was it! We end our guide here on how to fix the No Power options available error on Windows 11. If you have any queries, feel free to deliver them to us through the comment section below. We’ll get back to you as soon as possible.
If this guide helped you, please share it.


